If you’re a photography enthusiast who’s been mesmerized by the captivating beauty of the Northern Lights, you may be wondering what the best camera is for capturing this extraordinary natural phenomenon. In this article, we will provide you with a comprehensive guide to help you choose the perfect camera for your Northern Lights photography adventures. Whether you’re a beginner or an experienced photographer, we’ve got you covered!
Understanding the Northern Lights Phenomenon
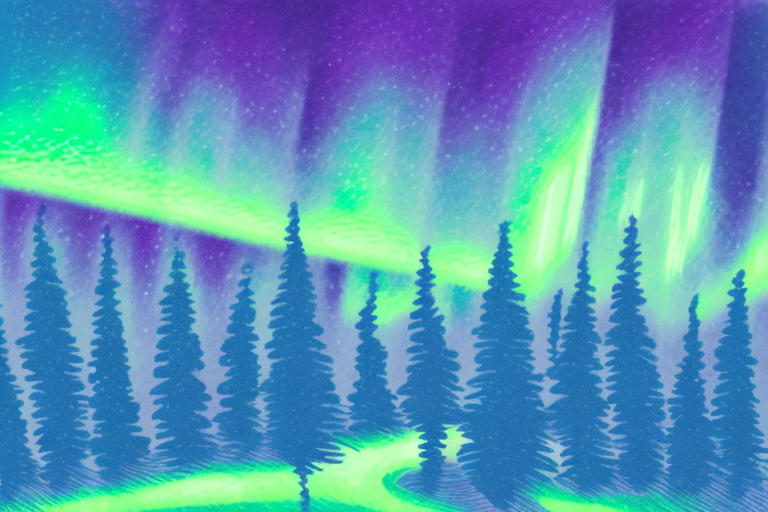
The Northern Lights, also known as the Aurora Borealis, are a captivating and awe-inspiring natural phenomenon that occurs in the high-latitude regions of the Earth. This mesmerizing light display is caused by charged particles from the sun colliding with the Earth’s atmosphere and emitting beautiful multi-colored lights.
To truly capture the magic of the Northern Lights, it is crucial to understand the unique characteristics of this phenomenon. The lights are dynamic and ever-changing, displaying vibrant colors dancing across the night sky. To photograph them effectively, you’ll need a camera that can capture fast-moving scenes and handle low-light conditions.
One of the best places to witness the Northern Lights is in the Arctic Circle. This region, which includes countries like Norway, Sweden, and Finland, offers optimal viewing conditions due to its proximity to the Earth’s magnetic poles. The clear, dark skies and minimal light pollution make it an ideal location for observing this natural wonder.
Scientists have discovered that the intensity and frequency of the Northern Lights are influenced by solar activity. During periods of high solar activity, known as solar storms, the lights can be seen further south than usual. These storms occur when the sun releases large amounts of energy in the form of solar flares and coronal mass ejections, which then interact with the Earth’s magnetic field.
How to Capture the Magic of the Northern Lights
Capturing the mesmerizing beauty of the Northern Lights requires careful planning and preparation. Here are some essential tips to help you capture the magic:
- Research your location: Choosing the right location is crucial for Northern Lights photography. Look for areas with minimal light pollution and clear, dark skies.
- Use a sturdy tripod: To avoid blurry images, a sturdy tripod is essential. It will keep your camera steady during long exposure shots.
- Shoot in RAW: RAW files retain more image data, allowing for greater flexibility during post-processing.
- Experiment with different compositions: Play around with different angles and perspectives to add creativity to your shots.
Keep in mind that photographing the Northern Lights can be challenging, but with the right camera and techniques, you can capture stunning images that will leave a lasting impression.
One important factor to consider when capturing the Northern Lights is the weather conditions. Ideally, you want to choose a night with clear skies and minimal cloud cover. Clouds can obstruct the view of the lights and make it difficult to capture their full beauty.
Another tip is to use a wide-angle lens. The Northern Lights can cover a large portion of the sky, so a wide-angle lens will allow you to capture more of the spectacle. Additionally, using a wide aperture (low f-number) will help gather more light and enhance the colors of the lights.
Factors to Consider When Choosing a Camera for Capturing the Northern Lights
When selecting a camera for Northern Lights photography, several factors come into play:
- Sensor sensitivity: Look for a camera with high ISO capabilities to handle low-light conditions effectively.
- Noise performance: A camera with excellent noise performance will ensure your images remain sharp and detailed even when pushing the ISO limits.
- Dynamic range: The Northern Lights display a wide range of lighting conditions. A camera with an excellent dynamic range will capture the subtle details in both the brightest and darkest areas of your images.
- Lens compatibility: Consider a camera with a wide range of lens options for different compositions and focal lengths.
- Autofocus capabilities: Northern Lights photography often involves shooting in the dark. A camera with reliable autofocus in low-light conditions is crucial for capturing sharp images.
By considering these factors, you can find a camera that will allow you to capture the awe-inspiring beauty of the Northern Lights with precision and clarity.
Additionally, it is important to consider the camera’s battery life when choosing a camera for capturing the Northern Lights. The Northern Lights can be a mesmerizing spectacle that can last for hours, and you wouldn’t want to miss out on capturing those magical moments due to a drained battery. Look for a camera with a long-lasting battery or consider carrying spare batteries to ensure you can capture the entire display without interruption.
Top Features to Look for in a Camera for Northern Lights Photography
When searching for the ideal camera to capture the Northern Lights, there are several key features to look for:
- Full-frame sensor: A full-frame sensor will provide superior image quality and low-light performance.
- High ISO capabilities: Look for a camera with excellent high ISO performance to handle the low-light conditions of Northern Lights photography.
- Long exposure capabilities: The ability to take long exposures is essential for capturing the magical movements of the Northern Lights.
- Electronic viewfinder: An electronic viewfinder can help you compose your shots accurately, even in low-light conditions.
- Weather sealing: As you’ll be shooting in potentially harsh environments, a camera with weather sealing will protect it from the elements.
By considering these top features, you can narrow down your options and find a camera that meets your specific needs for capturing the Northern Lights.
Additionally, it is important to consider the lens compatibility of the camera. Look for a camera that has a wide range of compatible lenses, particularly wide-angle lenses. Wide-angle lenses are ideal for capturing the expansive beauty of the Northern Lights and can help you capture the full scale of the aurora borealis in your photographs.
Exploring Different Camera Types for Photographing the Northern Lights
When it comes to Northern Lights photography, different camera types can excel in capturing this beautiful phenomenon:
DSLR Cameras: DSLR cameras are popular among photographers due to their versatility and excellent image quality. They offer a wide range of lens options and manual controls, allowing for precise adjustments.
Mirrorless Cameras: Mirrorless cameras are becoming increasingly popular due to their compact size and advanced features. They often have excellent low-light capabilities and offer high-resolution image sensors.
Compact Cameras: Compact cameras can be a convenient option for travelers and beginners. While they may not offer the same level of control and image quality as DSLR or mirrorless cameras, some models have impressive capabilities for their size.
When choosing a camera type, consider your photography goals and preferences to find the best option for your Northern Lights adventures.
Smartphone Cameras: In recent years, smartphone cameras have made significant advancements in terms of image quality and low-light performance. Many smartphones now have dedicated night mode features that can capture stunning Northern Lights photos. While they may not offer the same level of manual control as DSLR or mirrorless cameras, they are a convenient option for capturing spontaneous moments of the aurora borealis without the need for additional equipment.
Budget-Friendly Camera Options for Capturing the Northern Lights
If you’re on a budget or just starting with Northern Lights photography, there are several affordable camera options worth considering:
- Entry-level DSLR or mirrorless cameras: Many entry-level models offer excellent image quality and essential features for Northern Lights photography.
- Used or refurbished cameras: Look for reputable sellers that offer used or refurbished camera bodies. This way, you can save money while still obtaining a camera with the necessary capabilities.
Remember, capturing the Northern Lights is not just about having the most expensive camera. With the right techniques and dedication, you can capture breathtaking images with more budget-friendly options as well.
Another budget-friendly option for capturing the Northern Lights is to use a smartphone with a good camera. Many smartphones nowadays have advanced camera capabilities, including manual settings that allow you to adjust exposure and focus. Additionally, there are various photography apps available that can help enhance your smartphone’s camera performance for low-light conditions like the Northern Lights. So, if you already have a smartphone with a decent camera, it’s worth experimenting with it before investing in a dedicated camera.
Step-by-Step Guide: Setting Up Your Camera for Shooting the Northern Lights
Setting up your camera correctly is vital for successful Northern Lights photography. Follow these steps as a guide:
- Choose manual mode: Shooting in manual mode gives you full control over the camera settings.
- Select a wide-angle lens: A wide-angle lens will allow you to capture more of the night sky, giving your images a sense of context.
- Set a low ISO: Start with a lower ISO setting, such as ISO 800, and adjust accordingly to optimize the exposure.
- Open your aperture wide: To capture as much light as possible, set your lens to a wide aperture, such as f/2.8.
- Lengthen the shutter speed: Experiment with longer shutter speeds, anywhere from a few seconds to several minutes, to capture the movements of the Northern Lights.
- Use manual focus: As autofocus may struggle in low-light conditions, switch to manual focus and adjust it until the stars appear sharp.
- Take test shots and make adjustments: Review your test shots and make any necessary adjustments to exposure, composition, or focus.
By following this step-by-step guide, you’ll be well-prepared to capture stunning images of the Northern Lights.
Tips and Tricks for Getting Stunning Shots of the Northern Lights with Your Camera
Here are some additional tips and tricks to help you elevate your Northern Lights photography:
- Stay patient and be prepared to spend long hours outdoors, as the Northern Lights can be unpredictable.
- Experiment with different white balance settings to capture the varying colors of the lights accurately.
- Use a remote shutter release or timer to minimize camera shake during long exposure shots.
- Consider including interesting foreground elements, such as trees or landscapes, to add depth and context to your images.
- Shoot multiple exposures and create stunning composite images that capture the Northern Lights’ movement over time.
Remember, practice makes perfect. Don’t be discouraged if your first attempts don’t turn out as expected. Keep experimenting and refining your techniques, and you’ll soon be capturing breathtaking shots of the Northern Lights.
Lens Recommendations for Photographing the Northern Lights
Choosing the right lens is crucial for capturing the Northern Lights effectively. Here are some lens recommendations:
- Wide-angle lenses: Look for lenses with focal lengths around 14mm to 24mm. They will allow you to capture a broad view of the night sky and the captivating dance of the Northern Lights.
- Fast lenses: A lens with a wide maximum aperture, such as f/2.8 or wider, will help you capture more light and produce sharper images.
- Prime lenses: Consider prime lenses with fixed focal lengths, such as 24mm or 35mm. They often offer excellent image quality and wider apertures.
By selecting the right lens for your Northern Lights photography, you can capture the fine details and breathtaking beauty of this enchanting phenomenon.
Best Camera Settings for Shooting the Northern Lights at Night
When shooting the Northern Lights at night, adjusting your camera settings correctly is essential to capture the magic effectively. Here are some recommended settings:
- Shooting mode: Manual mode
- ISO: Start with ISO 800 and adjust accordingly to achieve the right exposure.
- Aperture: Set the aperture to a wide opening, such as f/2.8 or wider, to capture as much light as possible.
- Shutter speed: Experiment with longer shutter speeds, anywhere from a few seconds to several minutes, to capture the movements of the lights.
- White balance: Use a Kelvin temperature of around 3400K to 4000K to capture the natural tones of the Northern Lights.
Remember to continually review your images and make adjustments as needed to achieve the desired results.
Accessories That Enhance Your Northern Lights Photography Experience
In addition to a high-quality camera, several accessories can enhance your Northern Lights photography experience:
- A sturdy tripod to keep your camera steady during long exposure shots.
- A remote shutter release or timer to minimize camera shake.
- An extra set of batteries to ensure you don’t miss out on capturing the Northern Lights due to a drained battery.
- A camera bag or backpack to protect your equipment during your photography adventures.
- A headlamp with a red light option to help you see your camera settings in the dark without disturbing your night vision.
By having these essential accessories at hand, you’ll be well-prepared for your Northern Lights photography adventures.
Editing Techniques: Enhancing Your Northern Lights Photos with Post-Processing Software
Post-processing your Northern Lights photos can help you enhance their visual impact and bring out the subtle details. Here are some editing techniques to consider:
- Adjust exposure and contrast: Fine-tune the exposure and contrast to bring out the natural tones and vibrant colors of the Northern Lights.
- Enhance color saturation: Increase the saturation slightly to make the colors of the lights appear more vibrant and intense.
- Reduce noise: Apply noise reduction techniques to minimize any noise that may have been introduced during the long exposures.
- Correct white balance: Fine-tune the white balance to ensure the colors of the lights appear accurate and true to life.
- Crop and straighten: Make subtle adjustments to the composition by cropping or straightening your images if needed.
Remember, post-processing should enhance the natural beauty of the Northern Lights rather than drastically altering the scene. Use editing techniques with care to ensure the final result represents the magical experience you witnessed.
Inspiring Examples and Stories from Photographers Who Have Captured the Northern Lights
To further ignite your passion for Northern Lights photography, here are some inspiring examples and stories from photographers who have successfully captured this breathtaking phenomenon:
Photographer A: “I spent weeks planning my trip to Iceland to capture the Northern Lights. The experience was awe-inspiring, and I managed to capture a series of images that showcased the dancing lights against the stunning Icelandic landscape. It was a truly magical experience.”
Photographer B: “I experimented with various camera settings and techniques to capture the Northern Lights during my trip to Norway. The patience paid off, as I managed to capture a stunning composite image that showed the lights moving gracefully across the night sky. It was a moment I will never forget.”
Photographer C: “I used a budget-friendly camera and lens combination to capture the Northern Lights during my camping trip in Alaska. The camera performed admirably, and I was able to capture the lights’ vibrant colors and mystical movements. It just goes to show that you don’t need the most expensive gear to capture incredible images.”
These inspiring examples and stories serve as a testament to the beauty and allure of the Northern Lights and the incredible photographic possibilities they offer.
In conclusion, capturing the Northern Lights is an experience like no other. By choosing the right camera, mastering your camera settings, and employing various techniques, you can capture the awe-inspiring beauty of this extraordinary natural phenomenon. Whether you’re a beginner or a seasoned photographer, we hope this comprehensive guide has provided you with the knowledge and inspiration to embark on your own Northern Lights photography adventure. So grab your camera, find the perfect location, and get ready to capture images that will leave a lasting impression!


