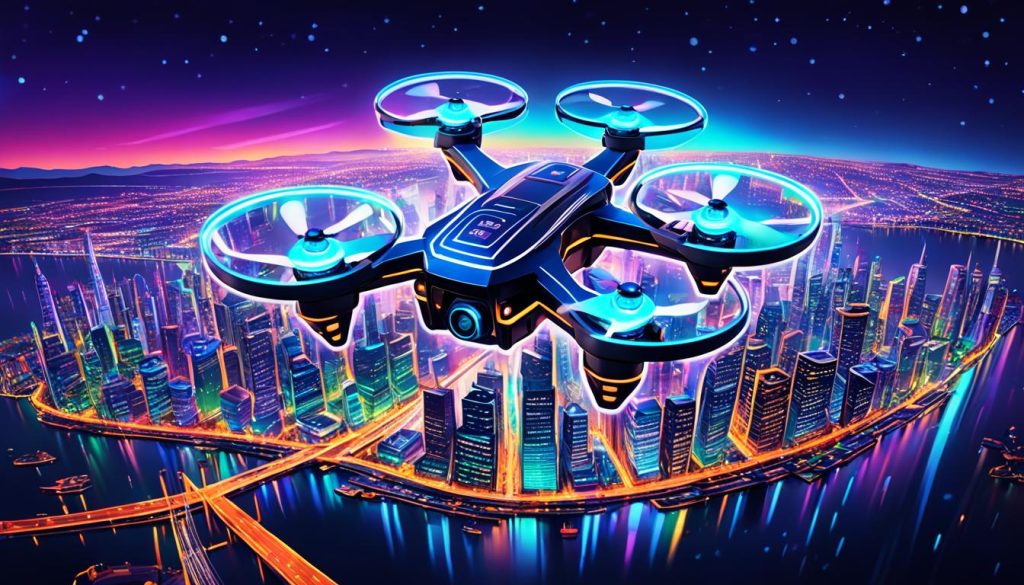
You can make amazing aerial artworks by planning complex flight paths for drone light paintings. This method combines drone aerial photography with long exposure night photography. It creates beautiful light trails in the sky.
To begin, you need a drone with LED lights and a camera that can take long exposure shots. Learning how to navigate waypoints is crucial for making detailed flight patterns. With the right tools and skills, you can turn the night sky into your canvas. You’ll create stunning light paintings that go beyond traditional photography.
We’ll explore drone light painting in more detail next. You’ll discover what equipment you need, how to find the best locations, set up your camera, and plan your flight. Get ready to improve your photography skills and make incredible aerial light art!
Understanding Drone Light Painting Fundamentals
Drone light painting is a unique art that mixes long exposure with flying lights. It lets photographers make amazing visuals by using LED lights on drones. Let’s dive into the basics of this fascinating practice.
What is light painting?
Light painting is a way to capture moving lights in photos with long exposures. Artists use handheld lights to draw in the air. Drone light painting takes this to the sky, literally.
The role of drones in light painting
Drones act as flying lights in this art. They can move freely in three dimensions. By planning flight paths and controlling LED lights, artists can draw complex designs in the night sky.
Essential equipment for drone light painting
To start drone light painting, you’ll need these items:
- A drone with programmable LED lights
- A camera that can take long exposures
- A strong tripod
- A remote shutter release
- Flight planning software
| Equipment | Purpose | Key Features |
|---|---|---|
| Drone | Light source | Programmable LEDs, stable flight |
| Camera | Image capture | Manual settings, RAW format |
| Tripod | Stability | Strong, adjustable height |
| Remote shutter | Reduce camera shake | Wireless, timer function |
| Software | Flight planning | Waypoint mapping, light control |
With these tools, you can start your drone light painting journey. You’ll create beautiful aerial displays that blend photography and technology.
Selecting the Perfect Location for Your Drone Light Painting
Finding the right spot for your drone light painting is crucial for amazing aerial art. The location is the heart of your project. Let’s explore how to choose the best place for your next light painting masterpiece.
First, think about airspace rules. Look for places with fewer flight restrictions. This lets you fly and create more freely. Then, find spots away from bright city lights. Dark skies make your light trails stand out.
Use aerial surveying to find interesting landscapes. Hills, water, or unique structures can add depth to your art. 3D mapping tools help you see potential flight paths and find obstacles.
After narrowing your choices, do a detailed site check. Visit each spot in the day to look for dangers. Ensure there’s a safe place to take off and land. Make sure you have enough space for your drone.
Think about these factors when picking your location:
- Distance from populated areas
- Natural or man-made features for backdrop
- Accessibility for you and your equipment
- Cell phone signal strength for drone connectivity
- Wind conditions and local weather patterns
It’s important to monitor the environment. Check local wildlife to avoid disturbing animals at night. Be careful with delicate ecosystems and follow Leave No Trace principles.
| Location Type | Pros | Cons |
|---|---|---|
| Open Fields | Ample flying space, fewer obstacles | May lack interesting background elements |
| Coastal Areas | Reflective water surfaces, dramatic scenery | Wind can be challenging, salt air may affect equipment |
| Urban Outskirts | Interesting architectural elements | More light pollution, potential for restricted airspace |
| Mountain Areas | Stunning natural backdrops | Challenging terrain, potential for sudden weather changes |
The perfect location balances safety, legality, and artistic potential. Take your time choosing a site. It’s the key to making drone light paintings that amaze everyone.
Mastering Long Exposure Photography Techniques
Long exposure photography is key for making beautiful drone light paintings. To get amazing light trails, you must know how to set your camera right. You also need to balance the light from the drone with the natural light. Let’s dive into the main techniques for the best results.
Camera Settings for Optimal Results
Begin by setting a low ISO, between 100 and 400, to cut down on noise. Pick a small aperture, like f/8 to f/11, for more depth in your shot. Then, adjust your exposure time for the light trails you want, usually 10 to 30 seconds.
Balancing Ambient Light and Drone Lights
Finding the right mix of ambient and drone light is key. Try different exposure settings to hit the mark. If the natural light is too strong, think about using neutral density filters to lessen the light your camera takes in.
Choosing the Right Lens and Filters
Wide-angle lenses, in the 14-24mm range, work best for big light trails. They let you capture more of what’s around you. Neutral density filters are also great for longer exposure times, especially when it’s very bright.
| Camera Setting | Recommended Range | Purpose |
|---|---|---|
| ISO | 100-400 | Reduce image noise |
| Aperture | f/8-f/11 | Increase depth of field |
| Exposure Time | 10-30 seconds | Control light trail intensity |
| Lens Focal Length | 14-24mm | Capture wide scenes |
Mastering these long exposure techniques will set you up to create stunning drone light paintings. These will show off your creativity and technical skills.
Designing Your Drone Light Painting Concept
Designing a drone light painting concept is exciting. It combines creativity with technical planning. Your aim is to make a visual story that grabs the audience and expands aerial art.
Begin by sketching your ideas. Let your imagination flow with shapes, patterns, and themes. Think about adding logos, abstract designs, or personal messages to your light painting.

Then, use 3D animation software to bring your sketches to life. This step lets you see and improve your concept before flying. Try different light colors and intensities to make your design look more real.
Think about these elements when planning your drone light painting:
- Flight paths that create smooth, flowing lines
- 3D elements that add depth to your composition
- Color combinations that evoke specific emotions
- Movements that enhance visual storytelling
The secret to great drone light painting is balancing art and tech. Plan every part of your design well. This way, you’ll make stunning aerial artworks that explore new possibilities in this field.
| Design Element | Purpose | Example |
|---|---|---|
| Shapes | Form the basic structure of your painting | Circles, spirals, triangles |
| Colors | Evoke emotions and create contrast | Warm reds, cool blues |
| Movement | Add dynamism to static images | Swirls, zigzags, waves |
| Themes | Convey specific messages or stories | Nature, technology, abstract concepts |
Plan and Execute Complex Flight Paths for Mesmerizing Drone Light Paintings
Creating stunning drone light paintings takes careful planning and precise execution. By mastering waypoint navigation and using specialized flight control software, you can design intricate patterns. These patterns will dazzle viewers.
Understanding Waypoint Navigation
Waypoint navigation is key to autonomous flight planning. It lets you plot specific points in 3D space for your drone to follow. You set coordinates, altitude, and speed for each waypoint. This gives you precise control over your drone’s flight path.
Creating a Flight Plan Using Specialized Software
To bring your light painting vision to life, use flight control software designed for GPS positioning and complex path planning. Popular options include DJI Ground Station Pro and Litchi. These tools let you:
- Set multiple waypoints
- Adjust altitude and speed between points
- Program light changes at specific locations
- Visualize your flight path in 3D
Testing and Refining Your Flight Path
Before attempting your light painting at night, test your flight plan during daylight hours. This allows you to:
- Ensure the drone follows the intended path
- Check for potential obstacles or interference
- Adjust timing and movements for optimal light trails
- Fine-tune waypoint positions and transitions
By iterating on your design and perfecting your autonomous flight planning, you’ll be ready to capture mesmerizing drone light paintings. These will push the boundaries of aerial creativity.
Configuring Your Drone’s LED Lights for Maximum Impact
Customizing your drone’s LED lights is crucial for amazing light paintings. Think of your drone’s lights as the brushes that paint the night sky. By adjusting light intensity, color patterns, and programmable effects, you can make your artistic vision come alive.
Begin by tweaking the brightness of your drone’s LEDs. Most drones let you control the light intensity through their apps. Try different levels to match your environment and camera settings perfectly.

Color patterns are key to your light painting’s look. With RGB LED systems, you can choose from millions of colors. Create gradients, rainbows, or stick to a specific color scheme that fits your concept.
Programmable effects can take your light paintings further. Set up sequences of flashing, pulsing, or fading lights for more dynamism. Some drones let you upload custom light patterns, offering endless creativity.
| LED Configuration | Effect | Best Use |
|---|---|---|
| Solid Color | Clean, bold lines | Geometric shapes, writing |
| Color Fade | Smooth transitions | Abstract art, landscapes |
| Strobe | Dotted lines | Star trails, particle effects |
| Multi-Color Pattern | Complex visuals | Detailed illustrations, logos |
Experimentation is the key to drone light painting mastery. Try different LED combinations to find unique effects that stand out. With practice, you’ll develop a style that makes your light paintings mesmerizing.
Safety Considerations and Legal Requirements for Night Flights
Flying drones at night needs extra care and knowing the rules. It’s important for drone pilots to understand and follow these rules. Let’s look at the key things you need to know for safe and legal night drone flying.
Obtaining Necessary Permits and Clearances
Before flying your drone at night, you must get the right permissions. Talk to your local aviation authority to learn about the rules for night flights and airspace restrictions. Make sure you have the needed permits and your drone pilot certification is current for flying at night.
Pre-flight Checklists and Safety Protocols
Make a detailed pre-flight checklist to make sure your drone is ready for night flying. This checklist should include:
- Checking drone lights and visibility markings
- Verifying battery levels and spare batteries
- Inspecting propellers and other critical components
- Testing remote control and camera functions
- Reviewing weather conditions and forecasts
Emergency Procedures and Risk Mitigation
Get ready for possible issues during night flights by setting up emergency plans. Practice these scenarios to feel more confident:
- Signal loss: Set up return-to-home function
- Battery failure: Plan emergency landing zones
- Collision avoidance: Use obstacle detection systems
- Unexpected weather changes: Monitor conditions closely
By following these safety steps and knowing the rules for night flights, you can make beautiful drone light paintings. And you’ll keep yourself and others safe.
Advanced Techniques for Multi-Drone Light Paintings
Multi-drone light paintings elevate aerial art to new levels. With multiple drones, you can make complex patterns in the sky. This method needs careful planning and execution for amazing results.
Swarm choreography is key to multi-drone light paintings. You must synchronize flights of several drones to make detailed patterns. Advanced software helps control these movements with precision.
When planning, give each drone a specific role. Some trace outlines, while others add details. Using different light colors and intensities adds depth. Make sure to watch the spacing and timing to prevent drones from crashing and keep patterns together.
| Drone Role | Light Color | Flight Pattern |
|---|---|---|
| Outline | White | Circular |
| Detail | Blue | Zigzag |
| Filler | Red | Spiral |
For amazing displays, try layered designs. Begin with a base layer of drones at one height, then add more layers above or below. This method creates a three-dimensional effect, making your light painting come alive.
Remember, practice is key. Start with simple patterns and get better with time. Soon, you’ll be making stunning multi-drone light paintings that amaze people and expand aerial art.
Post-Processing Your Drone Light Painting Images
After taking your drone light paintings, it’s time to make them shine. This step is key for getting the best out of your images. It helps create stunning final shots.
RAW File Editing Techniques
Begin by editing RAW files in your photo editing software. These files let you adjust exposure, color, and detail easily. Use the exposure slider to tweak brightness. Adjust highlights and shadows to show hidden details in your light trails.
Enhancing Colors and Contrast
Color grading is vital for eye-catching drone light paintings. Use selective color adjustment to make light trails stand out while keeping background tones natural. Boost contrast to make your light patterns pop against the night sky.
Removing Unwanted Elements
Clean up your images by removing distractions. Use the clone stamp or healing brush tools to erase stray light sources or imperfections. Apply noise reduction to reduce grain in dark areas, keeping your light trails clear.
Remember, small changes can make a big difference. Try different techniques to find the perfect balance. This will enhance your drone light paintings without losing their natural beauty.
Showcasing Your Drone Light Paintings: From Social Media to Galleries
Sharing your drone light paintings opens new doors. Use platforms like Instagram and 500px to show your work. Make your posts stand out with your best shots to draw followers and clients.
Creating an online portfolio is key for your drone light paintings. Pick a platform that’s easy to use and lets you categorize your work. Add descriptions to each image, sharing how you made it and the techniques you used.
Virtual art exhibitions are great for getting noticed. Look for online galleries and send your work to them. This can help you meet other artists and art lovers.
Think about making your drone light paintings into art prints. Selling high-quality prints on your website or at art fairs is a good idea. It lets fans own your work and brings in more money.
| Platform | Benefits | Best Practices |
|---|---|---|
| Wide reach, visual focus | Use relevant hashtags, post consistently | |
| Online Portfolio | Professional showcase | Organize work, include artist statement |
| Art Prints | Physical product, income | Offer limited editions, use quality materials |
Good social media marketing helps grow your audience. Talk to your followers, share what goes on behind the scenes, and work with other artists or brands. This can help you reach more people and find new ways to promote your drone light painting art.
Troubleshooting Common Drone Light Painting Challenges
Drone light painting can face unexpected hurdles. Light pollution might ruin your perfect shot. GPS signal issues could disrupt your flight path. Equipment malfunctions may occur at the worst possible moment. These technical issues can be frustrating, but don’t let them ground your creativity.
Environmental factors play a big role in your success. Sudden changes in weather conditions can force you to adapt quickly. Wind gusts might throw off your drone’s stability, affecting the light trails. Rain or fog can interfere with your camera’s ability to capture clear images. Be prepared to adjust your camera settings or modify your flight paths on the fly.
Problem-solving skills are crucial in drone light painting. Always have a backup plan ready. Carry spare batteries, props, and even a second drone if possible. Practice rapid camera adjustments to salvage a shoot if technical difficulties arise. Remember, some of the most stunning light paintings come from overcoming unexpected challenges.
By anticipating potential issues and preparing for them, you’ll be better equipped to handle any curveballs during your drone light painting sessions. Stay flexible, keep learning, and don’t let setbacks discourage you. With persistence and creativity, you can turn obstacles into opportunities for unique and captivating light paintings.


