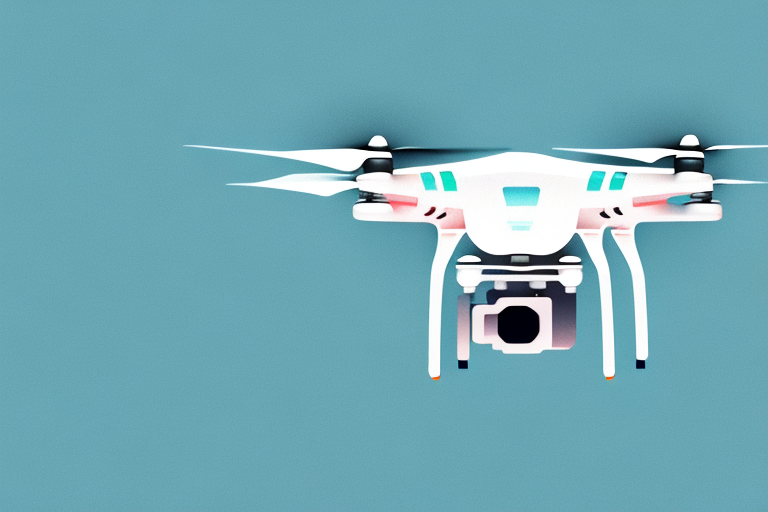
Drone photography has become increasingly popular in recent years, allowing photographers to capture stunning aerial shots from unique perspectives. However, the process of transferring and editing these photos can sometimes be a challenging task. In this comprehensive guide, we will delve into the intricacies of transferring and editing drone photos, covering everything from the basics of drone photography to advanced editing techniques.
Understanding the Basics of Drone Photography
Before we dive into the world of transferring and editing drone photos, it’s essential to have a solid understanding of the basics of drone photography. The first step is to familiarize yourself with the drone itself and its camera features. Different drone models offer various camera settings, such as resolution, image format, and exposure controls. Take the time to explore these options and experiment with different settings to achieve the desired results. Additionally, learning about composition and framing techniques specific to aerial photography will help you capture stunning images from above.
Once you have a good grasp of the technical aspects of drone photography, it’s important to also consider the legal and safety aspects. Familiarize yourself with the regulations and guidelines set by your local aviation authority regarding drone usage. This includes understanding where and when you can fly your drone, as well as any restrictions on altitude or proximity to people and buildings. Safety should always be a top priority, so make sure to follow best practices such as keeping a safe distance from obstacles, maintaining visual line of sight with your drone, and being aware of weather conditions that may affect flight stability. By adhering to these guidelines, you can enjoy the art of drone photography while ensuring the safety of yourself and others.
The Importance of Transferring and Editing Drone Photos
Once you’ve captured breathtaking aerial shots with your drone, the next step is to transfer and edit these photos to bring out their full potential. Transferring drone photos from your drone’s memory card to your computer or other storage devices is crucial to preserve your precious images and avoid potential data loss. Editing, on the other hand, allows you to enhance the quality of your shots, correct any imperfections, and add your personal artistic touch to the images.
Furthermore, transferring and editing drone photos also plays a significant role in organizing and categorizing your image library. By transferring the photos to your computer or storage devices, you can create folders and subfolders to keep your images organized based on location, date, or any other criteria that suits your needs. This makes it easier to locate specific photos when you need them and ensures that your collection remains well-structured and easily accessible.
Choosing the Right Transfer Method for Drone Photos
When it comes to transferring your drone photos to your computer, there are several methods you can choose from, including using a USB cable, a memory card reader, or a wireless transfer. Each method has its pros and cons, so it’s essential to consider factors such as speed, convenience, and compatibility with your devices. Whichever method you choose, ensure that your photos are transferred safely and securely to your computer or preferred storage location.
One popular method for transferring drone photos is using a USB cable. This method allows for a direct connection between your drone and computer, ensuring fast and reliable transfer speeds. However, it does require physically connecting the two devices, which may not be convenient in all situations.
Another option is using a memory card reader. This method involves removing the memory card from your drone and inserting it into a card reader connected to your computer. Memory card readers are often compatible with multiple types of memory cards, making them a versatile choice. However, this method may require additional equipment and can be slower compared to a direct USB connection.
Exploring Different Editing Software for Drone Photos
Once your photos are safely transferred, it’s time to dive into the world of editing. There is a wide range of editing software available, ranging from beginner-friendly programs with basic editing tools to professional-grade software with advanced features. Some popular options include Adobe Lightroom, Photoshop, Capture One, and Luminar. Explore these different software options, and choose the one that best suits your editing needs and level of expertise.
When choosing editing software for drone photos, it’s important to consider your specific editing needs and level of expertise. Beginner-friendly programs like Adobe Lightroom and Luminar offer intuitive interfaces and basic editing tools that are easy to learn and use. These programs are great for beginners who are just starting out with drone photography and want to enhance their photos with simple adjustments like exposure, contrast, and color correction.
Step-by-Step Guide: Transferring Drone Photos to Your Computer
Now let’s walk through a step-by-step guide on how to transfer your drone photos to your computer. Firstly, connect your drone to your computer using a USB cable or insert the memory card into a card reader. Once connected, navigate to the file directory of your drone or memory card, and locate the folder containing your photos. Select the desired photos and copy them to a designated folder on your computer’s hard drive. It’s important to organize your photos in a systematic manner to ensure easy accessibility and efficient workflow.
After transferring the photos to your computer, it is recommended to back them up to an external storage device or cloud storage service. This will provide an additional layer of protection in case of computer malfunctions or data loss. Regularly backing up your drone photos will help preserve your valuable memories and ensure their long-term availability.
Tips for Efficiently Organizing Your Drone Photo Library
With the growing number of photos you capture with your drone, keeping your photo library well-organized becomes crucial. Create a structured folder system that categorizes your photos based on dates, locations, or specific projects. Consider using descriptive file names and adding metadata to your photos to make searching and managing your library more convenient. Regularly back up your photo library to prevent data loss and keep your collection secure.
Additionally, consider using photo management software or apps that can help streamline the organization process. These tools often have features like automatic tagging, facial recognition, and advanced search options, making it easier to find specific photos within your library. Take advantage of these tools to save time and improve the efficiency of your photo organization workflow.
Common Challenges and Solutions in Transferring Drone Photos
While transferring drone photos can often be a seamless process, there are occasional challenges that you may encounter. One common issue is compatibility between different devices and file formats. Ensure that your computer supports the file format of your drone’s photos, and if necessary, consider installing the required codecs or converting the files to a compatible format. Additionally, be aware of potential file corruption or SD card errors, which can be avoided by safely ejecting the memory card from your drone and using reliable storage devices.
Another challenge that you may face when transferring drone photos is slow transfer speeds. This can be particularly frustrating when dealing with large files or a large number of photos. To overcome this, you can try using a high-speed USB cable or transferring the files to a faster storage device, such as an external SSD. It is also important to ensure that your computer’s USB ports are functioning properly and not experiencing any connectivity issues.
Furthermore, data loss during the transfer process is another potential challenge. To minimize the risk of losing your drone photos, it is recommended to create backups of your files before transferring them. This can be done by copying the files to multiple storage devices or using cloud storage services. Additionally, regularly updating your drone’s firmware and software can help prevent any compatibility issues that may lead to data loss.
Enhancing Your Drone Photos Through Editing Techniques
Editing is where the real magic happens in transforming your drone photos from good to extraordinary. There are various editing techniques you can apply to enhance your images. These techniques include adjusting exposure and white balance, adding vibrancy and saturation, sharpening details, and reducing noise. Experiment with different editing tools and techniques to find the right balance and achieve the desired look for each photo.
One important editing technique to consider is the use of filters. Filters can add a unique and artistic touch to your drone photos. For example, you can apply a black and white filter to create a dramatic and timeless effect, or use a vintage filter to give your photos a nostalgic feel. Additionally, you can experiment with color filters to enhance specific tones or create a specific mood in your images. Don’t be afraid to play around with different filters and see how they can transform your drone photos into stunning works of art.
Mastering the Art of Color Correction in Drone Photography
Color correction plays a significant role in achieving visually appealing drone photos. Since drones capture images from a different perspective, the colors in the photos may appear differently than what we perceive with our eyes. Mastering color correction techniques will allow you to correct any color cast, adjust the hue and saturation, and bring out the true beauty of your photos. Pay attention to the color balance and use selective adjustments to fine-tune specific areas of your image.
One important aspect of color correction in drone photography is understanding the color temperature. Different lighting conditions can affect the color temperature of your photos, resulting in a warm or cool cast. By adjusting the white balance, you can neutralize these color shifts and ensure accurate colors in your images.
Another technique to enhance the colors in your drone photos is through the use of color grading. Color grading involves manipulating the colors in your image to create a specific mood or atmosphere. This can be done by adjusting the color curves, applying color filters, or using color lookup tables (LUTs) to achieve a desired look. Experimenting with different color grading techniques can add a unique touch to your drone photography.
Essential Editing Tools and Features for Stunning Drone Photos
When it comes to editing drone photos, having a good understanding of essential editing tools and features is crucial. Some of the key tools include cropping and resizing, adjusting tones and contrasts, applying filters and effects, and retouching imperfections. Familiarize yourself with these tools and practice using them to unleash the full potential of your drone photos.
How to Crop and Resize Drone Photos for Different Purposes
Cropping and resizing your drone photos allows you to tailor them for different purposes and formats. Whether you want to showcase your images on social media platforms, print them, or use them for other specific projects, knowing how to effectively crop and resize your photos is essential. Consider the aspect ratios, composition guidelines, and target platforms to ensure that your cropped and resized images maintain their visual impact.
Achieving Professional-Looking Results with Image Retouching Techniques
Image retouching can take your drone photos to a whole new level of professionalism. Removing unwanted elements, dust spots, or lens flares, and enhancing details and textures are some common retouching techniques you can use. However, it’s important to maintain a balance and avoid overdoing the retouching, as it can make the image look artificial and unrealistic. Practice your retouching skills and develop your own style to create stunning drone photos.
Adding Visual Interest with Filters and Effects to Your Drone Photos
Filters and effects can help add a unique touch to your drone photos and create a specific mood or atmosphere. Experiment with different filters such as black and white, vintage, or cinematic effects to create visually striking images. However, use these effects sparingly and purposefully, ensuring that they enhance rather than overpower your photos.
Advanced Editing Tips for Perfecting Lighting and Exposure in Drone Photos
Lighting and exposure play a crucial role in drone photography, and mastering advanced editing techniques to perfect them can significantly elevate your images. Tools such as curves, levels, and graduated filters can be used to fine-tune the lighting and exposure in specific areas of your photos. Experiment with these advanced tools to bring out the desired highlights, shadows, and tonal ranges in your aerial shots.
Balancing Composition and Perspective in Your Edited Drone Photos
Composition and perspective are vital elements in creating visually captivating drone photos. Pay attention to the rule of thirds, leading lines, and the placement of your subject within the frame to achieve a balanced composition. Experiment with different perspectives and angles to create unique and interesting visual narratives in your edited drone photos.
Sharing and Showcasing Your Edited Drone Photos Online
Now that you’ve mastered the art of transferring and editing drone photos, it’s time to share and showcase your creations with the world. Social media platforms, photography websites, and online communities dedicated to drone photography provide excellent avenues for sharing your work and receiving feedback from other enthusiasts. Remember to respect copyright laws and privacy regulations when sharing your photos online.
In conclusion, transferring and editing photos taken with a drone requires a combination of technical knowledge, creativity, and attention to detail. By understanding the basics of drone photography, choosing the right transfer method, and utilizing various editing techniques and tools, you can transform your drone photos into stunning works of art. Enjoy the process of capturing, transferring, and editing your aerial shots, and watch as your skills and creativity in drone photography soar to new heights.


