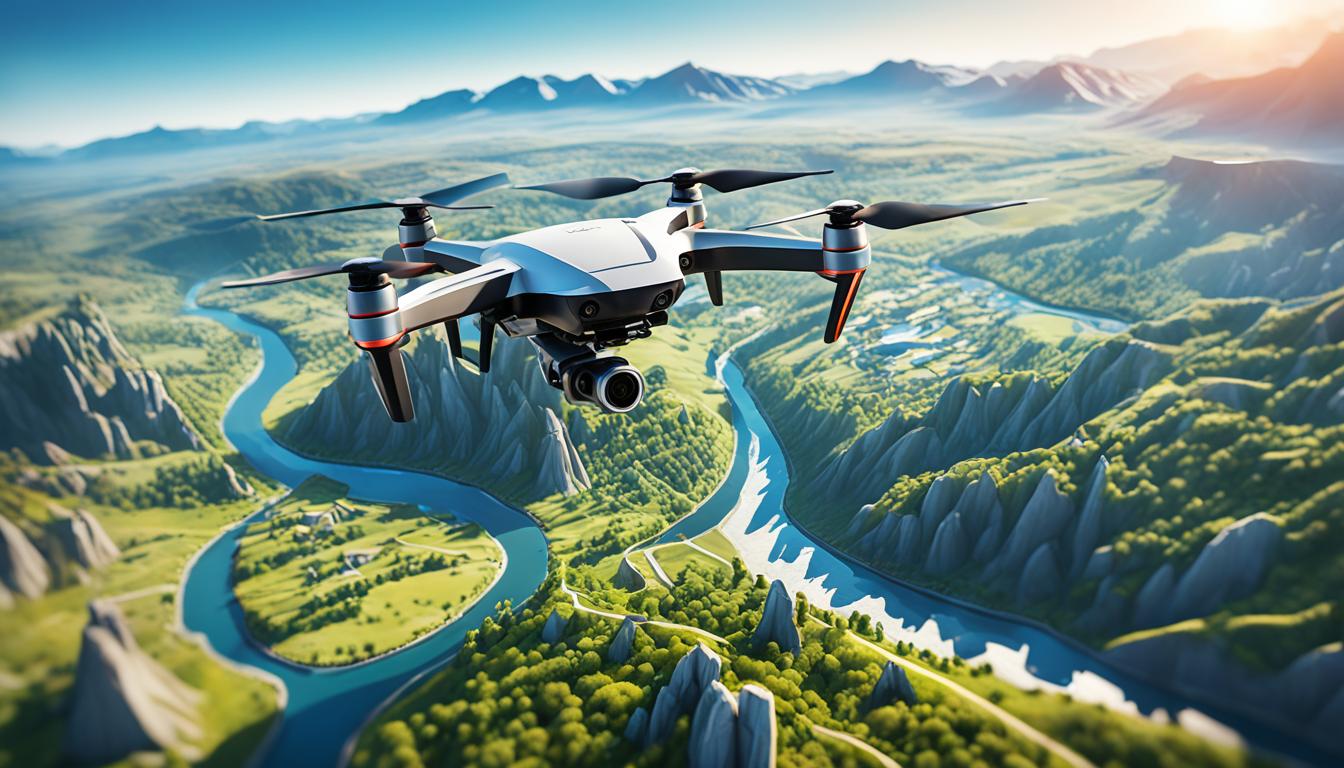
You can make drone photos clearer by using AI image sharpening. This tech uses advanced algorithms to look at your aerial shots. It then makes fine details stand out, improves clarity, and cuts down on noise.
AI sharpening is more than old-school editing. It uses deep learning to spot and fix specific parts of your photos. This makes your images sharper and more professional.
To start with AI image enhancement, pick a software that uses machine learning. These tools can make your photos clearer and keep the original details. They’re great at fixing issues like motion blur or graininess in low light.
Learning AI sharpening can change your drone photos for the better. It reveals small details and makes your aerial shots look amazing. We’ll cover this tech and how to use it to improve your drone images with artificial intelligence.
Understanding AI Image Sharpening for Drone Photography
AI image sharpening is changing the game for drone photography. It uses deep learning and computer vision to make aerial images clearer and more detailed. Let’s dive into how AI sharpening works and why it’s a big deal for drone fans and pros.
What is AI Image Sharpening?
AI image sharpening is a top-notch photo editing method. It uses artificial intelligence to check and boost image quality. Unlike old ways, it smartly spots edges, textures, and details in drone shots. The AI knows which parts are important and which are just noise, making images cleaner and sharper.
Benefits of AI Sharpening for Drone Photos
Drone photographers get a lot from AI sharpening:
- Enhanced detail retention in distant objects
- Reduced noise without losing sharpness
- Improved clarity in low-light conditions
- Correction of motion blur from drone movement
- Preservation of natural textures and colors
How AI Differs from Traditional Sharpening Methods
AI sharpening is different from old methods because it uses complex neural networks. This lets it make detailed changes that fit each photo’s needs. Old tools often can’t handle drone problems like haze or blur from movement. But AI sharpening can tackle these issues well.
| Feature | Traditional Sharpening | AI Sharpening |
|---|---|---|
| Adaptability | Fixed algorithms | Learns from image data |
| Precision | Uniform adjustments | Targeted enhancements |
| Noise Handling | Often amplifies noise | Reduces noise while sharpening |
By using AI in photo editing, drone photographers can get amazing results that were hard or impossible before with traditional methods.
Preparing Your Drone Photos for AI Enhancement
To make the most of AI image sharpening, start with top-notch drone photos. Focus on three main areas: shoot in RAW, set up your drone camera right, and master exposure and composition for aerial shots.
Shooting in RAW Format
RAW format is key for drone photography. It captures all the image data from your drone’s sensor. This means you have more flexibility when editing later. RAW files also keep more detail in bright and dark areas, which is great for AI enhancement.
Optimal Camera Settings for Drone Photography
Getting your drone camera settings right is crucial for clear aerial photos. Here’s how to get sharp shots:
- Use a fast shutter speed to cut down on motion blur
- Set a low ISO to reduce noise
- Pick an aperture that balances sharpness with depth of field
| Setting | Recommendation | Purpose |
|---|---|---|
| Shutter Speed | 1/500s or faster | Reduce motion blur |
| ISO | 100-400 | Minimize noise |
| Aperture | f/4 – f/8 | Balance sharpness and depth |
Importance of Proper Exposure and Composition
Right exposure makes sure your drone photos have balanced light and dark areas. Use your drone’s histogram to check this. For composition, follow the rule of thirds and look for leading lines in landscapes. These tips make your photos look great with AI sharpening.
By focusing on these areas, you’ll get drone photos ready for AI enhancement. This leads to amazing, detailed aerial images.
Choosing the Right AI Image Sharpening Software
Finding the right AI software to sharpen your drone photos is key to improving your images. There are many options out there. It’s important to know what features are best for enhancing your aerial shots.
Look at how well image enhancement tools work with your drone’s unique sensor layout. Some AI-powered editing software is great at handling RAW files from drones. It uses advanced debayering to cut down on artifacts and boost detail.
| Software | Drone Compatibility | Key Features | Price Range |
|---|---|---|---|
| Adobe Lightroom | High | Enhance Details, AI-powered presets | $9.99 – $19.99/month |
| DxO PureRAW | Excellent | DeepPRIME noise reduction, optical corrections | $129 (one-time purchase) |
| Topaz Sharpen AI | Good | Motion blur correction, focus enhancement | $79.99 (one-time purchase) |
| ON1 NoNoise AI | Very Good | Noise reduction, detail recovery | $69.99 (one-time purchase) |
The best AI software for you depends on your drone, how you shoot, and what you want to achieve. Try out free trials to see which photo editing software works best for you before you decide.
Step-by-Step Guide: Use AI Image Sharpening to Enhance Detail in Drone Photos
Are you ready to improve your drone photos? Let’s explore how AI image sharpening can make your aerial shots look amazing. We’ll go through the steps, from importing your photos to fine-tuning the final look.
Importing Your Drone Photos
First, move your RAW files from your drone to your computer. Then, open your AI-powered photo editing software and add the images you want to enhance. RAW files have more data, which helps in sharpening your photos better.
Applying AI Sharpening Algorithms
With your photos in the software, it’s time for AI to work. Choose the AI sharpening tool and apply it to your image. These smart algorithms look at your photo and make details clearer without adding noise.
Fine-tuning Sharpening Parameters
After AI sharpening, you might need to tweak the results. Most software lets you adjust settings like intensity, radius, and detail. Try different settings to get the right sharpness for your drone photo.
Balancing Sharpness and Noise Reduction
Sharpening can make your photos noisy, especially in low light. Use AI tools to reduce noise while keeping details sharp. Adjust both sharpening and noise reduction until your photo looks perfect.
By using these steps and AI technology, you can make your drone photos clearer and more detailed. The goal is to enhance your images without overdoing it.
Advanced Techniques for AI-Enhanced Drone Photography
Drone photography opens up a world of creative possibilities. By combining AI sharpening with advanced techniques, you can take your aerial images to new heights. Let’s explore some cutting-edge methods to elevate your drone photos.
HDR, or High Dynamic Range, is a powerful tool for drone photographers. It allows you to capture a wider range of tones in high-contrast scenes. To create HDR images, use exposure bracketing. This involves taking multiple shots at different exposures and blending them together. Many drones offer built-in HDR modes, but you can also merge bracketed exposures in post-processing software.
Image averaging is another technique that can significantly improve your drone photos, especially in low-light conditions. By taking multiple frames of the same scene and combining them, you can reduce noise and increase detail. This method works well for static subjects like landscapes or architecture.
- Use burst mode to capture multiple shots quickly
- Experiment with different exposure settings for bracketing
- Try manual blending in Photoshop for more control over HDR results
- Combine image averaging with AI sharpening for optimal results
When applying these techniques, remember to balance enhancement with natural-looking results. AI sharpening can help refine the details in your HDR and averaged images, but use it judiciously to avoid an artificial appearance. With practice, you’ll master these advanced methods and create stunning drone photographs that stand out from the crowd.
Overcoming Common Challenges in Drone Photo Sharpening
Drone photography has its own set of challenges that can impact image quality. Let’s look at how to overcome these issues for amazing aerial shots.
Dealing with Motion Blur
Making drone photos clear is key. Fast-moving things or shaky cameras can blur your shots. Use AI tools to spot and fix motion blur. Also, tweak your drone’s shutter speed and stabilization to cut down on blur.

Addressing Low-Light Conditions
Shooting in low light is tough for drones. Be careful when you up the ISO to brighten your photos to avoid too much noise. AI sharpening can bring back details in dark spots without harming the image quality. Try using longer exposures and keep your drone steady for the best look.
Managing High-Contrast Scenes
Scenes with lots of contrast are common in the sky. Take several photos at different exposures and blend them with HDR. AI sharpening can then make details pop in the whole image, keeping bright and dark areas clear.
| Challenge | Solution | AI Assistance |
|---|---|---|
| Motion Blur | Adjust shutter speed, use stabilization | AI-based motion analysis and correction |
| Low Light | Increase ISO, longer exposures | Noise reduction, detail recovery |
| High Contrast | HDR techniques, exposure bracketing | Detail enhancement across dynamic range |
Using AI solutions can greatly improve your drone photos. Try different methods to see what works best for each situation.
Combining AI Sharpening with Other Enhancement Tools
AI sharpening is a great tool, but it’s not the only thing you can use. When you mix it with other ways to improve images, your drone photos will look amazing. Let’s see how to make your editing better.
Begin by using AI sharpening to highlight the small details in your drone shots. After that, work on reducing noise. AI can remove graininess without losing the sharpness you added.
Then, focus on color correction. AI can help adjust colors to look natural. This is important for drone photos because the weather can change how colors appear.
Finally, use AI to enhance details like textures and small structures. This makes subtle details stand out that might have been missed before.
| Enhancement Tool | Purpose | Order in Workflow |
|---|---|---|
| AI Sharpening | Improve image clarity | 1 |
| Noise Reduction | Remove graininess | 2 |
| Color Correction | Adjust color balance | 3 |
| Detail Enhancement | Bring out textures | 4 |
Remember, the secret to great photo editing is to try different things. Experiment with these techniques in various orders to see what’s best for your drone photos.
Best Practices for Preserving Natural Detail in Drone Photos
Keeping natural detail in drone photos is key for real-looking images. When using AI sharpening tools, it’s important to balance clarity with the photo’s original feel.
Avoiding Over-Sharpening Artifacts
Too much sharpening makes images look fake. Start with small sharpening amounts and increase them slowly. Watch for edges and textures. Stop before you see halos or noise.
Maintaining Texture and Color Accuracy
Keeping texture and color right is crucial for real-looking photos. Choose AI tools that respect the original image. Adjust saturation and contrast carefully to keep the photo’s realism.

Balancing Sharpness Across Different Image Elements
Not every part of an image needs the same sharpening. Focus on important things like buildings or landscapes. Be gentle with the sky or water. This way, your photo looks natural and cohesive.
| Image Element | Sharpening Level | Consideration |
|---|---|---|
| Architectural Details | High | Enhance edges without creating halos |
| Landscapes | Medium | Maintain natural textures |
| Water Surfaces | Low | Preserve smoothness and reflections |
| Sky | Very Low | Avoid introducing noise |
Follow these tips to make your drone photos better while keeping them natural. The aim is to subtly improve quality, not to overdo it.
Comparing Before and After: Assessing AI Sharpening Results
When you use AI image sharpening on your drone photos, it’s key to check the results well. This helps you see if the AI makes your images better. Let’s look at how to check your sharpened images well.
Begin by putting your original and AI-sharpened images side by side. This lets you see the differences in details, clarity, and quality. Check out areas like building edges, tree lines, or textured surfaces. These often show big improvements after AI sharpening.
Zoom in on certain parts of your images to see small details better. Notice how the AI has made small textures or patterns clearer. This close look can show both good changes and possible issues, like over-sharpening artifacts.
- Check for increased clarity in distant objects
- Examine the sharpness of edges throughout the image
- Look for improved detail in shadow areas
- Assess the overall contrast and color balance
Remember, good AI sharpening should make your drone photos look better without being unnatural. If you see odd textures or fake-looking areas, you might need to tweak your sharpening settings. The aim is to get more detail without losing the real look of your aerial shots.
Real-World Examples: AI-Sharpened Drone Photos in Various Scenarios
Drone photography examples show how AI-enhanced images change the game in many settings. AI sharpening makes aerial shots better in different places. It boosts the quality of drone photos.
Landscape Photography
AI sharpening makes landscape drone photos look amazing. Mountains look clearer, with details in rocks and snow on peaks. Trees and leaves in forests stand out, showing details that were hard to see before.
Urban Environments
AI makes cityscapes look better. Skyscrapers and buildings show more detail. Cars and people on the street look clear, making city drone shots more real.
Low-Light Conditions
AI sharpening is great for tough lighting. Drone photos at sunset or twilight have less noise and better contrast. Night shots of cities show clear buildings and light trails from cars.
| Scenario | Before AI Sharpening | After AI Sharpening |
|---|---|---|
| Mountain Range | Soft edges, muted textures | Crisp ridges, detailed rock formations |
| Urban Skyline | Blurred building outlines | Sharp architectural features, clear windows |
| Night City | Noisy, indistinct lights | Defined light sources, reduced grain |
These examples show how AI-enhanced images change drone photography. From wide landscapes to busy cities, AI sharpening tools bring out more detail and clarity in the sky.
Conclusion
AI image enhancement has changed drone photography for the better. It gives us tools to make aerial shots clearer and more detailed. By using the right AI algorithms and good shooting tips, you can make your drone photos stand out.
Try different AI sharpening tools to see what works best for you. Whether you’re taking pictures of wide landscapes or detailed city scenes, AI can reveal hidden details and improve your photos. Just remember to balance sharpness with noise reduction for a natural look.
When using these tips for drone photography, keep your photos real. Don’t overdo the sharpening and keep colors and textures accurate. With practice and the right AI tools, you can take amazing aerial photos that show the world from a new angle.


