To pick the right urban landscapes for drone videos, focus on dynamic cityscapes and iconic landmarks. Look for places that show off the city’s unique vibe and movement. This will help you create stunning aerial shots.
Drone videography gives a new view of familiar places. Search for spots with different building styles, busy streets, or changing skylines from day to night. These features will make your hyperlapse videos more interesting, showing city life in motion.
When looking for places, think about how people and cars move around. Busy city areas, winding roads, and places where people walk a lot can make great patterns in your hyperlapse. Also, consider the lighting and time of day to make your shots look their best.
Understanding Aerial Hyperlapse Photography
Aerial hyperlapse photography combines time-lapse and drone tech for amazing visuals. It shows how time and movement change a city from above. This gives us a new way to see urban landscapes.
Definition and Concept
Hyperlapse is a type of time-lapse that moves the camera between shots. When drones are added, it creates smooth shots of cities moving. This makes a video that speeds up time, taking us through the city.
Benefits of Using Drones for Hyperlapse
Drones change hyperlapse by offering:
- Stability for smooth footage
- Access to hard-to-reach spots
- Precision in camera moves
- Flexibility in framing shots
This lets photographers get amazing views of cities and buildings from above.
Differences from Traditional Time-Lapse
Traditional time-lapse keeps the camera still. Aerial hyperlapse moves it. This makes the video more dynamic.
| Aspect | Traditional Time-Lapse | Aerial Hyperlapse |
|---|---|---|
| Camera Position | Stationary | Moving |
| Perspective | Single viewpoint | Multiple viewpoints |
| Planning Required | Moderate | Extensive |
| Viewer Experience | Observational | Immersive |
Creating aerial hyperlapse needs a lot of planning and drone control. The final video is more engaging and shows cities in a new way. It’s great for telling stories and showing how cities change over time.
Essential Equipment for Urban Drone Hyperlapse
To make amazing urban drone hyperlapse videos, you need the right gear. You’ll want a drone that’s stable, has a long battery life, and can capture smooth footage of cities.
First, pick a drone that shoots in 4K resolution. It should have adjustable frame rates and great dynamic range to capture city details well. A remote controller that lets you move the drone smoothly is also key.
Neutral density (ND) camera filters are a must for handling bright city lights. They help you get the right shutter speed for cool motion blur. Don’t forget extra batteries for longer shoots and fast memory cards to store your videos.
| Equipment | Purpose |
|---|---|
| 4K Camera Drone | Capture high-resolution footage |
| ND Filters | Balance exposure in bright conditions |
| Extra Batteries | Extend flight time |
| High-Capacity Memory Cards | Store large video files |
| Precision Remote Controller | Execute smooth flight paths |
Choose a drone with features to avoid obstacles in cities. A compact, easy-to-carry design is great for moving around the city. With the right tools, you’ll be set to capture beautiful hyperlapse videos that show the lively city vibe.
Choosing the Perfect Urban Setting
Finding the right urban setting is key for amazing hyperlapse drone videos. The right spot can turn your footage into something truly special. It highlights the beauty of city skylines and the hustle of city life.
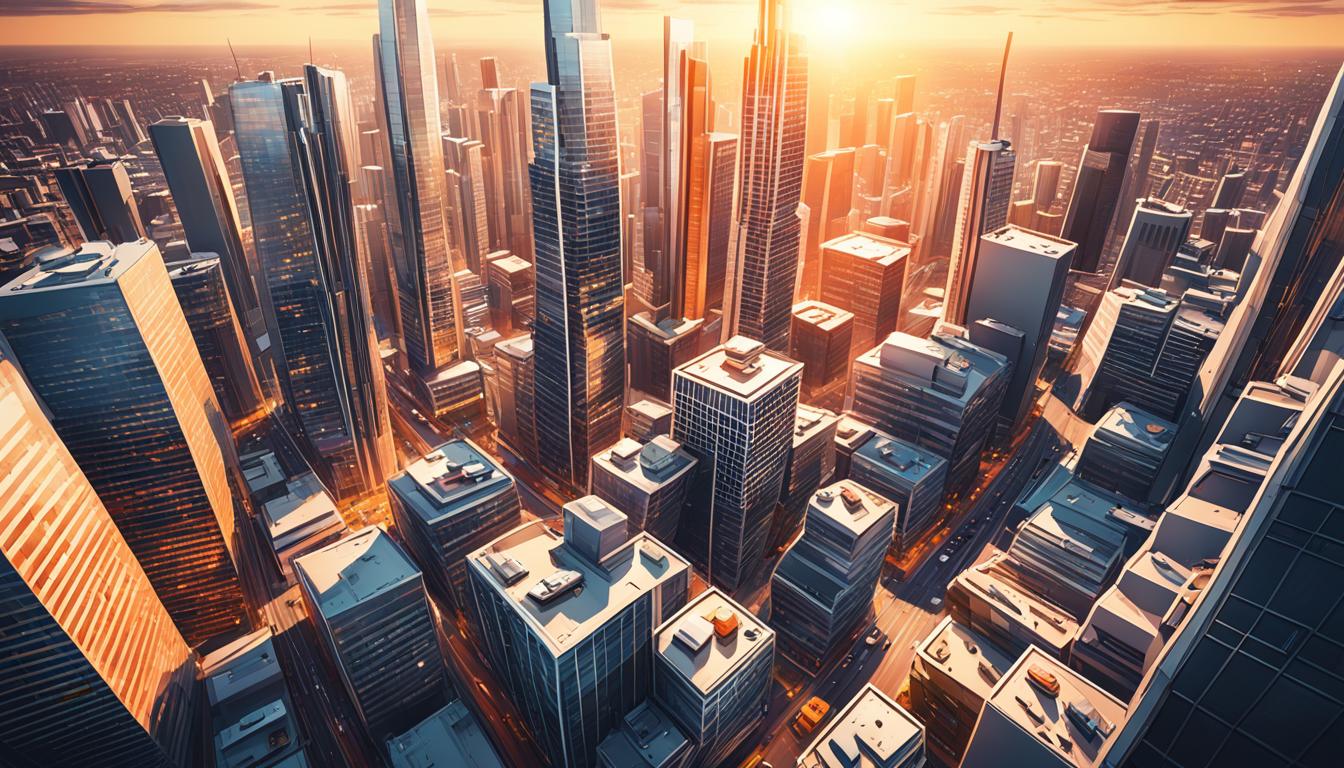
Iconic Landmarks and Skylines
Look for iconic landmarks that show what a city is all about. These landmarks help anchor your hyperlapse and give viewers a sense of place. Skylines add drama, especially during the golden hour or at night when cities light up.
Dynamic City Streets and Intersections
Include busy streets and intersections to capture the city’s energy. These spots let you show traffic, people, and the city’s vibe. Find areas with unique patterns or road layouts to make your footage stand out.
Architectural Marvels and Unique Structures
Search for architectural wonders that catch the eye. Modern skyscrapers, historical buildings, and bridges are great for filming. They often have shapes and textures that look great in hyperlapse videos.
| Urban Setting | Key Features | Best Time to Shoot |
|---|---|---|
| Iconic Landmarks | Recognizable structures, historical significance | Golden hour, blue hour |
| City Skylines | Panoramic views, city lights | Sunset, night |
| Busy Intersections | Traffic patterns, pedestrian movement | Rush hour, midday |
| Architectural Marvels | Unique designs, contrasting styles | Depends on lighting conditions |
Always check out locations before filming and think about lighting, weather, and any obstacles. By picking your spots carefully, you’ll make hyperlapse drone videos that capture the essence of city life.
Planning Your Urban Hyperlapse Shoot
Planning is crucial for making amazing urban hyperlapse videos with your drone. First, find locations that look great and are easy to get to. Look for places with famous landmarks, busy streets, or unique buildings. Think about how the light changes during your shoot.
Weather is very important for your success. Check the forecast and pick clear, calm days. Wind can make your drone shaky, and rain can make your photos blurry. Try to shoot during the golden hour or blue hour for the best city views.

Remember to get the right flight permissions. Look into local drone laws and get any needed permits before flying in the city. Some places have strict rules or no-fly zones near airports or government buildings. Following these rules helps you avoid legal trouble and makes your shoot go smoothly.
| Planning Element | Considerations |
|---|---|
| Location Scouting | Visual appeal, accessibility, unique features |
| Weather Conditions | Clear skies, low wind, optimal lighting |
| Flight Permissions | Local laws, permits, no-fly zones |
| Time of Day | Golden hour, blue hour, traffic patterns |
By focusing on these planning steps, you’ll be ready for a great urban hyperlapse shoot. Good planning leads to amazing results that show the energy and beauty of city life from above.
Mastering Drone Flight Techniques for Smooth Footage
Drone piloting for hyperlapse videos needs precision and finesse. To capture stunning urban scenes, you must master smooth motion and flight control. Let’s dive into the key techniques to boost your hyperlapse footage.
Slow and Steady Movements
The key to smooth hyperlapse footage is gentle, controlled moves. Don’t make sudden turns or speed changes. Plan your flight path well and move smoothly. This makes each frame flow into the next smoothly, giving a fluid view.
Maintaining Consistent Altitude
Keeping your drone at a steady height is key for pro-looking hyperlapse videos. Height changes can make your footage jumpy. Practice keeping a steady height while moving sideways. This skill takes time but makes your city shots look better.
Practicing Manual Control
While automated modes are useful, manual control is best for hyperlapse. Spend time improving your manual flying skills. Start with simple moves and get more complex as you feel more confident. Remember, controlling a drone smoothly is an art that gets better with practice.
| Technique | Benefits | Challenges |
|---|---|---|
| Slow Movements | Smooth transitions, cinematic feel | Requires patience and precision |
| Consistent Altitude | Professional look, stable footage | Wind interference, sensor accuracy |
| Manual Control | Greater creative freedom, precise shots | Steep learning curve, potential for errors |
Focus on these core techniques to boost your drone piloting skills for hyperlapse. Remember, practice is key to getting those amazing city shots.
Composition Strategies for Urban Landscapes
To make amazing urban hyperlapse videos, learn how to compose your shots. Use the rule of thirds, framing, and storytelling to make your drone footage stand out.

The rule of thirds splits your frame into a 3×3 grid. Put important things along these lines or where they cross. This makes your shots look better. When taking city shots, put landmarks or interesting buildings at these spots to catch the viewer’s eye.
Framing adds depth and interest to your hyperlapse. Use things like trees or statues in the front to frame the city skyline or streets. This makes the scene look bigger and directs the viewer’s attention to what’s important.
Storytelling in hyperlapse videos tells a story through your shots. Start with a wide shot of the city, then zoom in on interesting parts. This helps viewers see the city’s layout and spot its best parts.
| Composition Technique | Application in Urban Hyperlapse | Effect on Viewer |
|---|---|---|
| Rule of Thirds | Place skyline at upper third line | Creates balance and visual interest |
| Framing | Use arches or windows to frame landmarks | Adds depth and focuses attention |
| Leading Lines | Follow roads or rivers through the city | Guides the eye and creates flow |
| Symmetry | Capture reflections in water or glass buildings | Evokes a sense of harmony and order |
Try different angles and heights for your hyperlapse. Low shots make buildings look big, while high shots show the city’s layout. Using these strategies, you’ll make hyperlapse videos that grab and keep your audience’s attention.
Select Urban Landscapes for Mesmerizing Hyperlapse Drone Videos
Finding the right urban landscape is crucial for amazing hyperlapse drone videos. The cityscape you choose can make or break your video. Let’s look at how to pick the best spot for your drone adventures.
Evaluating Visual Interest and Movement
Look for a mix of still and moving parts when picking locations. Busy spots, crowded areas, or waterfronts are great for action. Add in buildings to tell a story in your hyperlapse.
Considering Light and Time of Day
Light is key in city photography. The golden hours before and after sunrise give cities a warm glow. Try different times to capture the city’s mood. Nighttime shows off city lights and traffic trails.
Incorporating Seasonal Changes
Seasons add depth to your hyperlapse videos. Show the same spot in different seasons to show change. Spring brings blossoms, summer crowds, fall foliage, and winter snow, each adding something special to your shots.
| Season | Visual Elements | Best Time for Shooting |
|---|---|---|
| Spring | Blossoming trees, increased outdoor activity | Mid-morning to early afternoon |
| Summer | Vibrant colors, crowded parks and streets | Early morning or late evening (to avoid harsh sunlight) |
| Fall | Colorful foliage, crisp urban landscapes | Mid-afternoon for warm light on autumn colors |
| Winter | Snow-covered buildings, holiday decorations | During snowfall or just after for pristine scenes |
Think about these factors for your urban exploration. You’ll make hyperlapse videos that really show city life’s essence and energy. The secret is blending different sights into a story that moves and captures the viewer.
Navigating Legal and Safety Considerations
Flying drones in cities needs careful attention to the rules and safety. Before starting your hyperlapse project, learn the local laws for flying drones. Many cities have rules about where and when you can fly.
Look out for no-fly zones near airports, government buildings, and other restricted places. These areas are important for keeping people safe and secure. Use official drone apps to check where you can fly legally in your city.
Be mindful of privacy when taking footage. Don’t fly over private property or crowded places without permission. This keeps you in line with the law and helps build trust with the community.
- Get the needed permits for flying drones in cities
- Always keep your drone in sight
- Only fly during the day unless you have special permission
- Keep your drone below 400 feet high
- Avoid flying in bad weather
Make sure to practice flying in open areas before trying complex shots in the city. Remember, flying safely is more crucial than getting the perfect shot. By following these tips, you’ll make amazing urban drone hyperlapses while respecting the law and keeping everyone safe.
Post-Processing Techniques for Urban Hyperlapse
The magic of urban hyperlapse comes alive in post-processing. This is where you turn raw footage into a captivating journey through cityscapes. Let’s look at some key techniques to make your urban hyperlapse videos stand out.
Stabilization and Smoothing
Video editing software with advanced stabilization is crucial. Tools in Adobe Premiere Pro or DaVinci Resolve help remove jitters or vibrations. Your goal is smooth motion that moves viewers through the city effortlessly.
Color Grading for Urban Aesthetics
Color correction is vital for capturing urban landscapes. Adjust contrast, saturation, and color temperature to enhance your cityscape’s mood. You might cool down a busy financial district or warm up a sunset over skyscrapers. Try different looks to match your vision.
Adding Creative Effects and Transitions
Visual effects can elevate your hyperlapse. Use speed ramping for key moments or masks for unique scene transitions. Adobe After Effects is a great place for creativity. But remember, subtlety is key. Let the city be the main focus of your video.


