To get amazing drone light paintings, learn about long exposure and adjust your drone’s LED lights. This type of photography lets you make cool patterns in the night sky.
For great results, know the basics of night photography and light trails. Mix these skills with creative flying paths. You’ll make aerial light paintings that look amazing.
Getting good at drone camera settings is key for light painting. You’ll figure out how to set exposure, aperture, and ISO. This way, you capture the right mix of light and trails. With time, you’ll make beautiful art from the sky.
Understanding Drone Light Painting Basics
Drone light painting is a new way in drone photography. It mixes low light with manual camera settings for amazing effects. Let’s explore this exciting art form.
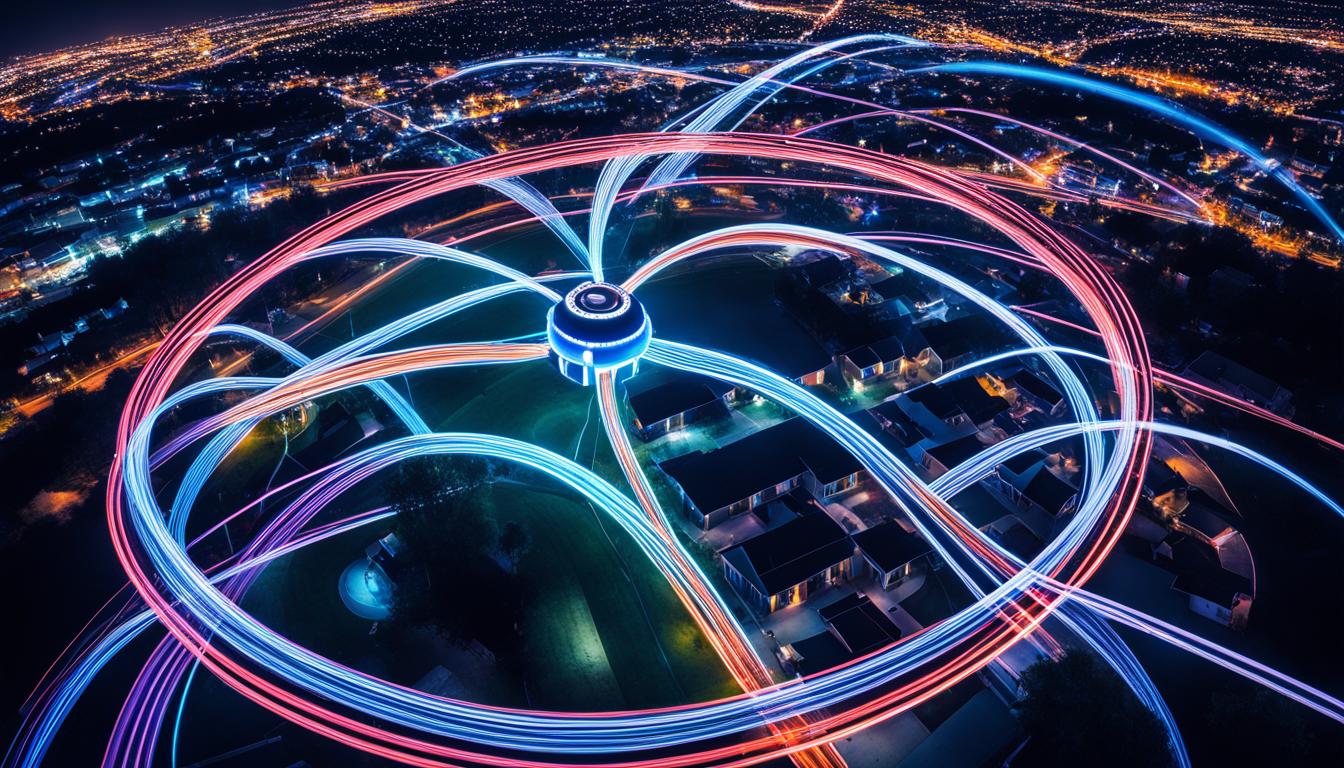
What is drone light painting?
It’s about flying a drone with LED lights and taking long-exposure photos. The drone’s path makes beautiful light trails. This method breaks new ground in photography, letting you be creative at night.
Equipment needed for drone light painting
To start with drone light painting, you’ll need:
- A drone with bright LED lights
- A camera that can control settings and take long shots
- A strong tripod
- A remote shutter release
- Extra batteries for the drone and camera
These tools help you capture amazing light trails and keep your photos clear in the dark. Learning to control your camera is key for great light paintings.
Legal considerations for drone photography
Before you start drone light painting, learn about the laws. Important things to know include:
- Getting permits for flying at night
- Respecting privacy and no-fly zones
- Following height limits
- Having the right drone registration and pilot license
Knowing these rules helps you make beautiful drone light paintings legally. Remember, being patient and practicing is important for getting good at it.
Choosing the Right Location for Drone Light Painting
Finding the perfect spot for drone light painting is key to your success. The right location can lead to amazing shots and a smooth shoot. Let’s look at how to pick the best places for your drone light art.
Scouting Techniques for Ideal Shooting Spots
Begin by searching online for potential locations. Aim for places with little light pollution and interesting views. Use satellite images to spot good spots. Then, visit in daylight to check the ground and plan your shots.
Background and Composition Considerations
Choose spots with backgrounds that match your light painting. Mountains, cities, or water can add depth. Look for natural frames like trees or rocks to improve your shot. Think about how different camera settings will change your shot in your chosen spot.
Safety and Accessibility Factors
Focus on safe and easy-to-reach locations for night flights. Check local rules and use apps like AirMap to see where you can fly. Make sure you have a safe place to take off and land. Avoid obstacles like power lines or tall buildings. Always put safety first in drone photography.
| Location Type | Pros | Cons |
|---|---|---|
| Rural Fields | Low light pollution, open space | Limited interesting features |
| Urban Parks | Interesting structures, accessible | Potential flight restrictions |
| Coastal Areas | Reflective surfaces, unique landscapes | Wind challenges, moisture risks |
Choosing your location carefully will help you create stunning aerial light paintings. These will show off your creativity and skills.
Essential Camera Settings for Drone Light Painting
Mastering night photography settings is key for drone light painting. Your camera’s manual controls are crucial for capturing the beauty of light trails. Let’s explore the essential settings to improve your drone long exposure photography.
Begin by setting your camera to manual mode. This lets you control every part of your shot. Choose a shutter speed of 1/15 to 1/60 seconds for stunning light trails. Longer exposure times make the light paths more visible.
Next, adjust your aperture to f/2.8 or f/4. These settings let more light into your camera, which is vital for night shots. Keep your ISO low, around 400, to avoid digital noise. If you need to raise it, do so carefully to prevent graininess.
Focus is crucial for drone light painting. Use manual focus and set it to infinity or a distant light. This keeps your drone’s light patterns sharp during the exposure. Autofocus often fails in low light, so manual is better.
- Shutter speed: 1/15 to 1/60 second
- Aperture: f/2.8 to f/4
- ISO: Start at 400
- Focus: Manual, set to infinity
Try these settings to find what works best for your drone light painting. With practice, you’ll learn to adjust these settings for amazing results in different lights and places.
Mastering Manual Mode for Drone Photography
Learning to control your camera manually is key for amazing drone light paintings. You can take incredible photos in low light by adjusting settings right. Let’s look at the main parts of manual mode for light painting with drones.
Setting the Appropriate Shutter Speed
Shutter speed is crucial for light trails. For drone light painting, try shutter speeds from 1/15 to 1/60. Slower speeds let in more light, making trails longer and smoother. Faster speeds give you shorter, clearer lines. Change it up based on your drone’s speed and the look you want.
Adjusting Aperture for Light Painting
Aperture controls how much light gets in and the depth of field. For drone light painting, start with f/2.8 to f/4. This range captures light well and keeps trails sharp, with some background detail.
Choosing the Optimal ISO Setting
ISO is key in low light. Start at ISO 400 and adjust as needed for your drone’s LED and the look you want. Higher ISOs make more light sensitive but might add noise. Find the right balance for brightness and clear images.

Mastering manual mode takes time. Try different shutter speed, aperture, and ISO settings to get what you want. With practice, you’ll know how these settings work together. This will help you take amazing drone light paintings in any condition.
Optimize Camera Settings for Stunning Drone Light Paintings
Mastering night photography settings is key for drone light paintings. By adjusting your camera, you can get amazing light trail effects. This will take your aerial photos to a new level.
Fine-tuning Exposure for Light Trails
To get stunning light trails, tweak your shutter speed and aperture. Use long exposure techniques, keeping your shutter open for seconds to minutes. This lets the drone’s LED lights create bright streaks in the night sky.
Balancing Ambient Light with Drone LEDs
It’s important to balance your light painting with the surrounding environment. Try different drone LED brightness levels to match the ambient light. This balance makes your images more interesting, with the light trails standing out.
Techniques for Achieving Sharp Focus
Getting clear focus in low light is tough. Here are some tips:
- Use manual focus for precise control
- Pre-focus on a distant light source before flying
- Set focus to infinity for sharp drone light patterns
Master these night photography settings to create stunning drone light paintings. Practice adjusting your camera, balancing light sources, and keeping focus. This will help you make light trail effects that amaze everyone.
Drone Flight Techniques for Light Painting
Mastering drone flight techniques is key to making stunning aerial light paintings. As you improve your skills, you’ll learn to control flight paths and speeds. Let’s dive into some important techniques to take your aerial light painting to the next level.

Point of Interest (POI) mode is a big help for aerial light painting. It lets your drone orbit around a fixed point, making perfect circles and halos. Try flying at different heights and radii to change your light patterns. Varying speeds can make your light trails thicker or thinner.
For clean light trails, smooth movements are a must. Practice gentle starts and stops to avoid shaky lines in your shots. Mix straight lines, curves, and zigzags to make unique shapes and patterns in the sky.
| Flight Technique | Light Painting Effect | Drone Camera Settings |
|---|---|---|
| Slow ascent/descent | Vertical light streaks | Long exposure, low ISO |
| Circular POI flight | Halo or spiral effect | Bulb mode, adjust aperture |
| Figure-eight pattern | Infinity symbol | Manual focus, wide aperture |
| Zig-zag flight path | Lightning bolt effect | High shutter speed, tripod |
Adjust your drone camera settings for each technique. Try different shutter speeds, apertures, and ISOs to get the perfect light trails. With practice, you’ll make amazing aerial light paintings that showcase your creative drone photography skills.
Creative Patterns and Shapes in Drone Light Art
Drone light painting opens up a world of creative possibilities. You can craft stunning designs in the night sky with aerial light painting. Let’s explore some techniques to elevate your creative drone photography and produce captivating light trail effects.
Circular Patterns with POI Mode
Point of Interest (POI) mode is a game-changer for creating perfect circles in the sky. Set your drone to orbit around a fixed point. Adjust the radius and speed to achieve your desired light trail effects. Experiment with different altitudes to add depth to your aerial light painting.
Exploring Flight Paths
Don’t limit yourself to circles. Try various flight paths to create unique shapes:
- Zigzags for dynamic energy
- Spirals for hypnotic effects
- Figure-eights for flowing curves
- Straight lines for geometric precision
Vary your drone’s speed during flight to produce interesting light trail textures.
Layered Designs
Take your creative drone photography to new heights by combining multiple exposures. This technique allows you to build complex, multi-layered light paintings. Start with a base pattern, then add additional passes with different colors or shapes. The result? Stunning aerial light paintings that captivate viewers.
Remember to experiment with LED accessories like diffusers and colored gels. These tools can add variety to your light patterns, enhancing the overall impact of your drone light art. With practice, you’ll master the art of creating mesmerizing shapes and patterns in the night sky.
Post-Processing Tips for Drone Light Paintings
After taking your drone light paintings, post-processing is key to making them shine. This step helps improve colors, reduce noise, and make the composition better. Let’s look at some important techniques to make your night shots and long exposures stand out.
Color correction is vital for drone light paintings. Adjust the white balance to show the LED colors right against the night sky. Use the color temperature slider to change the mood of your image. For bright light trails, increase saturation a bit, but don’t go too far.
Reducing noise in long exposure shots is tricky. Apply it carefully to keep the light patterns clear. Start with a low setting and increase it slowly until you get the right balance between noise reduction and detail.
Try different crops to improve your shot. See what works best for your light painting by using various aspect ratios. If it helps, crop your image tightly to make it more powerful.
For more complex light paintings, stack multiple shots. This lets you create detailed designs or time-lapse effects. Use layer blending modes in your editing software to mix different light patterns smoothly.
| Post-Processing Step | Technique | Effect |
|---|---|---|
| Color Correction | Adjust white balance and saturation | Accurate LED colors, enhanced mood |
| Noise Reduction | Apply conservatively | Reduced noise, preserved details |
| Composition | Experiment with cropping | Improved framing and impact |
| Advanced Editing | Stack multiple exposures | Complex designs, time-lapse effects |
Post-processing is like an art form. Take your time to try out different tools and techniques to enhance your drone light paintings. With practice, you’ll find a workflow that boosts your night shots and shows off your unique style.
Troubleshooting Common Issues in Drone Light Photography
Drone light photography can be tough, but you can beat common problems with the right methods. Let’s look at how to tackle wind, focus, and battery issues for amazing light paintings.
Dealing with Wind and Stability Challenges
Wind can mess up your drone light paintings. Choose a drone that can handle the wind and use stabilization features. Try to shoot in calm times, like early morning or late evening. If it gets windy, fly lower to lessen the shake.
Overcoming Low-Light Focusing Problems
Focusing in low light is tricky. Focus on lights far away before flying. Use manual focus for better control. Some drones have focus peaking, which shows sharp edges, helping you get clear shots in dim light.
Managing Battery Life for Extended Shoots
Long light painting shots need a lot of flying time. Bring extra batteries for your drone and camera. Plan your flight to use your time wisely. Choose drones that fly longer for more complex light paintings.
| Issue | Solution | Impact on Light Painting |
|---|---|---|
| Wind | Use wind-resistant drone, lower altitude | Smoother light trails, consistent patterns |
| Low-light focus | Pre-focus, manual focus, focus peaking | Sharp images, clear light designs |
| Battery life | Extra batteries, efficient flight paths | Longer shooting sessions, complex designs |
By fixing these common problems, you’ll get better at drone light photography. Try out different camera settings and light painting methods to make stunning aerial art.
Advanced Techniques for Stunning Drone Light Art
Are you ready to elevate your drone light painting? Let’s dive into some advanced techniques in drone photography. By mixing traditional light painting with drone tech, you can make stunning 3D light sculptures that seem magical.
Try matching your drone’s moves with music for dynamic light shows. This adds rhythm and feeling to your light art, making the night sky come alive. Use several drones to make complex light patterns and designs, exploring the limits of drone light art.
Also, find unique spots for your drone art. A great backdrop can make your light painting stand out. Think about using local landmarks or nature to add depth to your work.
The secret to amazing drone light art is creativity and trying new things. Keep improving your skills, and you’ll soon make drone light paintings that amaze people. These will show off the power of drone photography.


