Flying your drone at night with LED lights can create stunning patterns in the sky. Use weather like fog, clouds, or storms to add to your art. This mix of tech and nature makes unique aerial art.
Drone light painting lets you explore new creative ideas in photography. Pick the right time and weather to capture amazing shots. These photos show off your art and nature’s beauty.
Weather adds to the mood and depth of your aerial art. Misty evenings give a mystical touch, while clouds make a great backdrop. Even lightning storms can add excitement to your drone light paintings when done safely.
To start with aerial art, learn drone basics, camera settings for night shots, and how to spot great weather for your art. With time and effort, you’ll make images that go beyond regular photos.
Understanding Drone Light Painting Basics
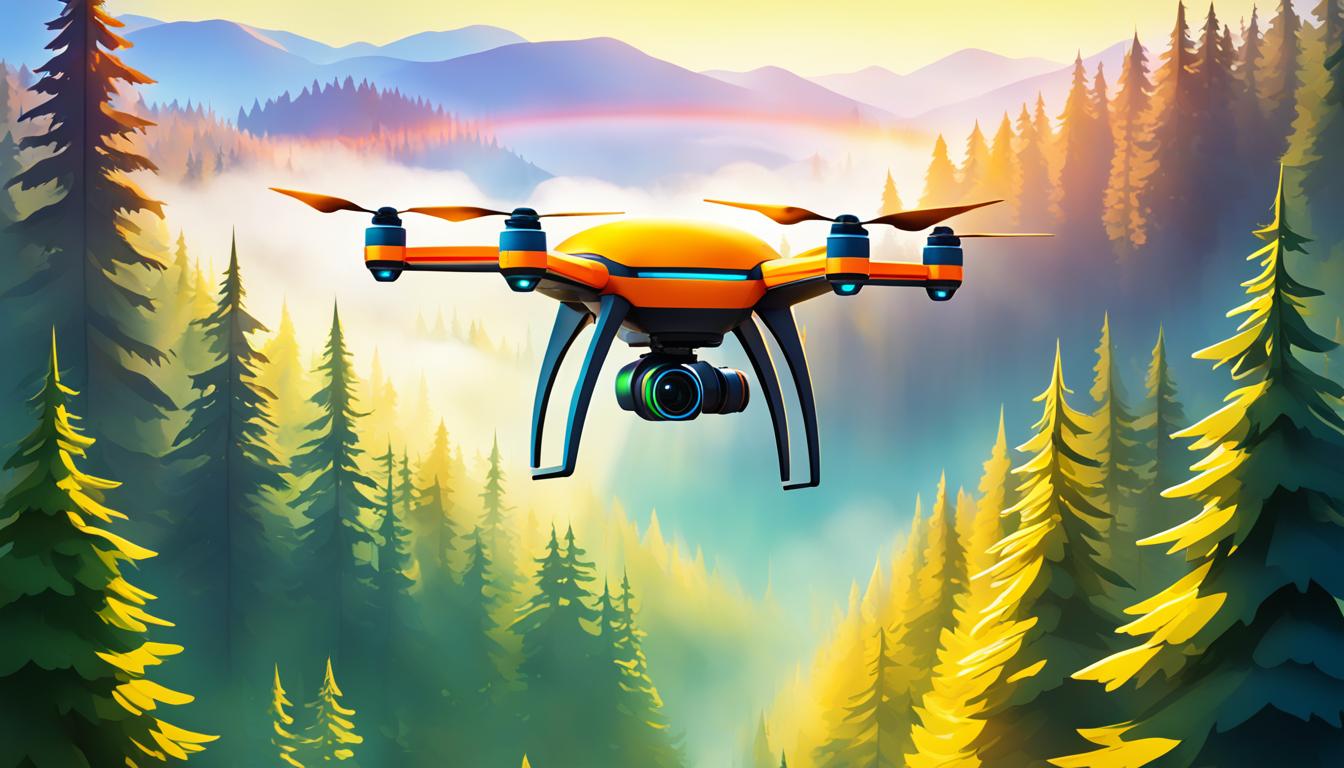
Drone light painting combines advanced tech with art. It uses drones with LED lights for amazing night shots. Let’s dive into this exciting way of aerial cinematography.
What is drone light painting?
It’s about flying a drone with lights on to “paint” in the sky. The drone’s path looks like a line of light in the photo. This mix of drone and night photography lets artists express themselves in new ways.
Essential equipment for aerial light painting
For drone light painting, you’ll need:
- A drone with programmable flight paths
- High-quality camera capable of long exposures
- Bright LED lights attachable to your drone
- Remote controller for precise flight management
- Tripod for camera stability
Safety considerations for night flights
Night flights need extra care. Keep safe by:
- Getting the right permits for night flying
- Following drone laws
- Making sure your drone is easy to see
- Keeping in touch with your team
- Flying in a safe, open place
| Equipment | Purpose | Importance |
|---|---|---|
| Drone | Creates light patterns | Essential |
| Camera | Captures long exposures | Critical |
| LED Lights | Produces light trails | Crucial |
| Remote Controller | Manages flight path | Necessary |
The Role of Weather in Atmospheric Photography
Weather is key in atmospheric photography. It brings depth, texture, and mood to your shots. Mastering weather conditions opens up creative possibilities for your drone light paintings.
Fog photography shows how weather changes your shots. Flying your drone in misty landscapes softens edges and creates a dreamy feel. This turns ordinary scenes into magical places, great for light trails.
Clouds are another great subject for your drone photos. Cumulus clouds add texture and depth, while cirrus clouds bring delicate patterns to the sky. By flying at the right time, you can make your photos dynamic and always changing.
Storms add drama to your photos. Lightning lights up the sky, giving you moments of intense light to capture. Rain and wind add movement and energy, making your light paintings more dynamic.
| Weather Condition | Atmospheric Effect | Photography Technique |
|---|---|---|
| Fog | Soft, diffused light | Long exposure, low altitude flights |
| Clouds | Textured backgrounds | Backlighting, silhouette creation |
| Storms | Dramatic lighting, movement | Fast shutter speeds, multiple exposures |
Knowing how weather and light work together is crucial for amazing atmospheric photos. By using the changing weather, you can make drone light paintings that really stand out.
Leverage Weather Conditions for Atmospheric Drone Light Paintings
Weather is key to making amazing drone light paintings. By using nature’s elements, you can take your aerial art to the next level. Let’s see how to use weather to your benefit.
Incorporating fog and mist
Fog adds a magical touch to your light paintings. Fly your drone at different heights in misty weather to capture fog layers. This adds depth to your photos. Try warm and cool light colors to make the scene even more mystical.
Using cloud formations to your advantage
Clouds can make your light trails look amazing. Look for unique shapes and textures to match your light trails. Low clouds create a dreamy look, while storm clouds add drama. Time your flights during golden hour for stunning cloud colors.
Capturing lightning and storms safely
Chasing storms with drones is exciting but requires care. Keep away from thunderstorms and use a lightning trigger for precise shots. Mix long exposures with quick light bursts for dramatic contrasts in your paintings.
| Weather Condition | Light Painting Technique | Safety Consideration |
|---|---|---|
| Fog | Layered light trails | Maintain visual line of sight |
| Clouds | Silhouette painting | Monitor wind speeds |
| Lightning | Staccato light bursts | Avoid flying in rain |
Master these techniques to make drone light paintings that amaze people. They’ll show off nature’s beauty in a unique way.
Optimal Weather Conditions for Drone Light Painting
Creating stunning drone light paintings needs careful thought about the weather. The best weather has clear skies, low wind, good visibility, and comfy temperatures. Let’s look at the perfect weather for your next light painting adventure.
Clear skies are key for sharp light trails. A few clouds can add interest, but too many clouds can hide your artwork. Try for nights with few clouds to make your light trails pop against the dark sky.
Wind speed is important for drone stability. For the best shots, fly when winds are under 10 mph. This keeps your drone steady, giving you sharp, clear light trails. Winds over 10 mph can make your light trails blurry or messy.

Visibility matters too. Pick nights with clear air and low humidity for the best shots. Fog or haze can create cool effects but might hide your light trails. Try different visibility levels to find what works best for you.
Temperature affects your comfort and your drone’s work. Most drones work well between 32°F and 104°F. Cold weather can shorten your drone’s battery life, so plan your shoots in moderate temperatures.
| Weather Factor | Optimal Condition | Impact on Light Painting |
|---|---|---|
| Sky | Clear with minimal clouds | Crisp, visible light trails |
| Wind Speed | Below 10 mph | Stable drone flight, sharp patterns |
| Visibility | Clear air, low humidity | Well-defined light trails |
| Temperature | 32°F to 104°F | Optimal drone performance, longer flight time |
Keep these weather factors in mind for amazing drone light paintings. Always check the weather forecast and plan your shoots for the best results.
Techniques for Capturing Atmospheric Effects
To master drone light paintings, you need both camera skills and post-processing knowledge. Let’s look at key techniques to improve your aerial photos.
Long Exposure Settings for Light Trails
For smooth light trails, use long exposure photography. Set your shutter speed between 2 to 30 seconds. This depends on your drone’s speed and the trail length you want. Keep your ISO low (100-400) to cut down on noise and use a narrow aperture (f/8-f/11) for depth.
Adjusting ISO and Aperture for Different Weather
Weather affects your camera settings a lot. In foggy scenes, up your ISO a bit (400-800) and open up your aperture (f/4-f/5.6) to let in more light. For starry nights, go for a higher ISO (1600-3200) and a wide aperture (f/2.8-f/4) to catch the faint stars.
Post-Processing Tips for Enhancing Atmospheric Elements
Post-processing can really make atmospheric elements pop. Use adjustment layers to highlight cloud details, boost contrast in fog, or make light trails glow. Try different color grading to set the mood and highlight the weather.
| Weather Condition | ISO | Aperture | Shutter Speed |
|---|---|---|---|
| Clear Night | 100-400 | f/8-f/11 | 10-30 seconds |
| Foggy | 400-800 | f/4-f/5.6 | 5-15 seconds |
| Starry Night | 1600-3200 | f/2.8-f/4 | 15-30 seconds |
Planning Your Drone Light Painting Session
Planning your drone light painting session is key to getting amazing shots. You need to think about flight planning, finding the right location, and checking the weather. These steps will help you have a safe and successful shoot.
First, look for great places to take pictures. Find spots with beautiful landscapes or buildings that match your light painting ideas. Think about how easy it is to get there, the lighting, and any obstacles you might face. Cities can offer unique shots, but places in the countryside might give you clearer skies.
Weather is a big part of your planning. Use different sources to get the best forecast. You want clear skies, low wind, and no rain. Fog or mist can make your photos look even better if you’re ready for it.
Finally, plan your drone flight carefully. Think about where you’ll fly, following the rules and avoiding dangers. Set up your camera and lights before you start to make the most of your time. Don’t forget to bring extra batteries.
| Planning Element | Considerations |
|---|---|
| Location Scouting | Accessibility, features, lighting, obstacles |
| Weather Forecasting | Sky conditions, wind speed, precipitation |
| Flight Planning | Airspace rules, flight paths, camera settings |
Putting time into planning will boost your chances of taking amazing drone light paintings. It also makes sure your flight is safe and legal.
Choosing the Right Location for Weather-Enhanced Light Paintings
Choosing the right spot is key to amazing weather-enhanced drone light paintings. The setting you pick can greatly change the look of your photos. It lets you capture both city scenes and natural landscapes beautifully.
Urban vs. Rural Settings
City lights and buildings make urban areas perfect for light paintings. You can capture skyscrapers, bridges, and lively streets. In contrast, rural areas have darker skies. This makes the light trails clearer and the stars more vibrant.
Coastal Areas and Bodies of Water
Coastal spots like beaches, lakes, and rivers are great for drone light paintings. The water can reflect your light trails, making them look even more stunning. Fog and mist near the coast add a magical touch to your photos.
Mountain and Forest Landscapes
Mountains and forests add drama to your light paintings. Their tall peaks and dense woods create striking shadows against the night sky. These places often have changing weather. This means you can capture fog, clouds, or even the northern lights in your shots.
| Location Type | Advantages | Challenges |
|---|---|---|
| Urban | City lights, architectural elements | Light pollution, flight restrictions |
| Rural | Dark skies, clear light trails | Limited background elements |
| Coastal | Water reflections, mist effects | Wind, moisture on equipment |
| Mountain/Forest | Dramatic landscapes, varied weather | Difficult terrain, potential obstructions |
Think about how easy it is to get to your location, drone rules, and the weather. Each place has its own challenges and rewards. Try out different spots to find what works best for you.
Mastering Night Photography with Drones
Night photography with drones lets you see the world in a new way. You can take amazing pictures of the night sky and make beautiful star trails. Let’s dive into the key parts of this exciting field.
Essential Camera Settings
To get clear photos in the dark, change your drone camera settings:
- Slow shutter speed: Use longer exposures to gather more light
- Higher ISO: Increase light sensitivity, but be cautious of noise
- Wide aperture: Open up the lens to let in more light
Capturing Star Trails
Star trails are a beautiful part of night sky photos. Here’s how to make them:
- Set your drone to hover in a stable position
- Use an ultra-long exposure (30 seconds or more)
- Take multiple shots and stack them in post-processing

Dealing with Light Pollution
Light pollution is a big problem in city areas for night photos. Here’s how to deal with it:
- Seek out darker locations away from city lights
- Use light pollution filters on your drone camera
- Adjust white balance to counteract artificial light color casts
| Setting | Urban Areas | Dark Sky Locations |
|---|---|---|
| ISO | 400-800 | 1600-3200 |
| Shutter Speed | 15-30 seconds | 30+ seconds |
| Aperture | f/2.8-f/4 | f/2.8 or wider |
By using these tips, you’ll get great night photos with your drone. Always remember to fly safely and follow the rules at night.
Creative Ideas for Weather-Inspired Light Paintings
Weather-inspired drone light paintings open up a world of creative photography. By combining natural elements with special effects, you can make stunning aerial artworks. Let’s explore some innovative light painting techniques that use the power of weather phenomena.
Simulating Aurora Borealis Effects
Bring the magic of the Northern Lights to your photos with drone light painting. Use color-changing LEDs and specific flight patterns to mimic the swirling, dancing lights of the aurora. Try flying your drone in gentle waves or S-curves while adjusting the light colors from green to pink and purple for a realistic effect.
Creating “Ghost” Images in Fog
Foggy conditions are perfect for crafting eerie, ghostly images. Position your drone strategically and time your light bursts to create shapes that seem to emerge from the mist. Experiment with quick flashes of white light against the fog’s backdrop for a truly spine-tingling effect in your creative photography.
Painting Rainbows After Storms
Capture the beauty of a rainbow using light painting techniques. After a storm, fly your drone in a smooth arc pattern while cycling through multi-colored lights. This special effect can add a touch of wonder to your post-storm landscapes, creating a unique blend of natural and artificial beauty in your aerial artwork.


