You can make amazing pictures by mixing drone and ground light painting. This new way combines old night photography with modern drone tech. It lets you make three-dimensional light art that grabs people’s attention.
Long exposure photography gets exciting when you add UAV light art and ground elements. By planning your moves in the air and on the ground, you open up new creative doors in night photography. This mix of aerial and ground techniques lets you express yourself in new ways, making low-light photos more interesting.
Starting this adventure, you’ll learn to use drones to paint light in the sky and create patterns on the ground. The outcome? Stunning images that mix the best of both worlds. They create a visual experience that’s more than just the sum of its parts.
Understanding Light Painting Photography
Light painting photography is a creative way to make amazing images by moving lights during long camera shots. It has grown a lot since it started, giving photographers many ways to express themselves.
Definition and History of Light Painting
Back in 1889, Étienne-Jules Marey and Georges Demeny made the first light painting. They used chronophotography to capture human movement. Then, in 1953, David Potts came up with the camera rotation method. This turned London landmarks into colorful swirls.
Types of Light Painting Techniques
Light painting has many techniques, each making different pictures:
- Light Graffiti: Making text or drawings with handheld lights
- Creative Illumination: Lighting specific parts or objects in a scene
- Camera Rotation: Moving the camera while taking a picture for cool effects
- Kinetic Light Painting: Mixing camera movement with light for cool effects
Equipment Needed for Light Painting
To begin with light painting, you’ll need some key gear:
| Equipment | Purpose |
|---|---|
| Camera with manual mode | Allows for long shots and full control |
| Sturdy tripod | Keeps camera still during long shots |
| Light sources | Flashlights, LED strips, or special tools |
| Remote shutter release | Helps avoid camera shake when taking shots |
With these tools and methods, you can dive into light painting photography. You can make beautiful images that mix art and tech.
The Rise of Drone Photography in Light Painting
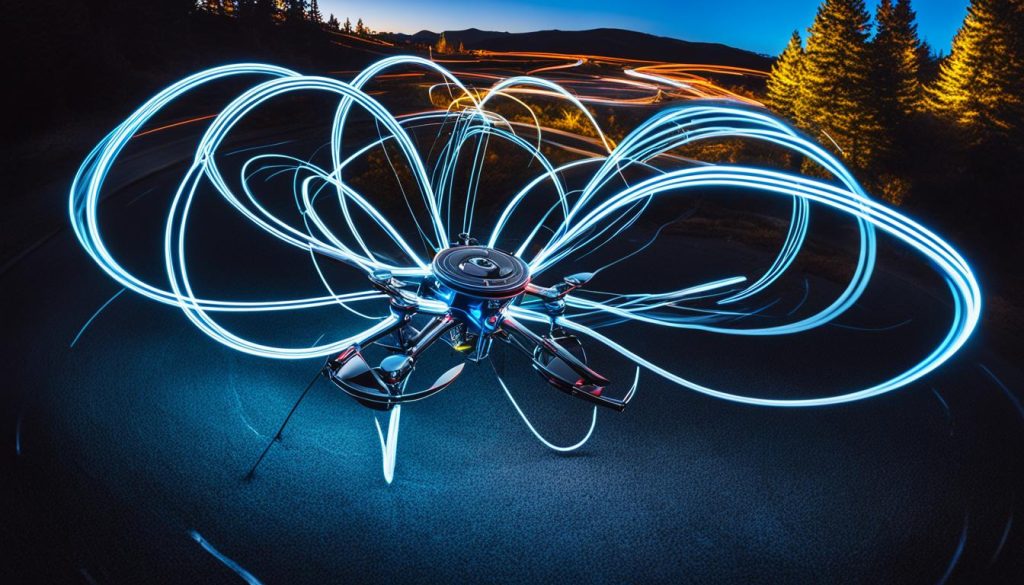
Drone technology has changed light painting, offering new ways for artists to make stunning night art. UAV Light Art mixes drone flying skills with traditional light painting. This lets artists paint with light in three dimensions, making detailed patterns and shapes in the sky.
With drones, aerial photography has reached new heights. These drones have programmable LED lights that can make complex designs. This creates a stunning mix of technology and art, expanding what we can express creatively.
Drone Videography takes light painting further by showing the whole process. Time-lapse videos capture the dance between drone pilots and artists on the ground. This teamwork creates amazing visuals that were hard to do before.
| Traditional Light Painting | Drone Light Painting |
|---|---|
| Limited to ground level | 3D aerial capabilities |
| Manual light source control | Programmable LED patterns |
| Static camera position | Dynamic flight paths |
| Individual artist creation | Collaborative team effort |
As drones get better, we’ll see more new uses in light painting. The mix of UAV Light Art, Aerial Photography, and Drone Videography is changing night art. It’s inspiring a new group of artists to aim high with their work.
Essential Equipment for Drone Light Painting
Drone light painting mixes advanced tech with art. You’ll need special drone gear, LED lights, and settings for long exposure. Let’s look at the key equipment for this unique photography method.
Choosing the Right Drone
Choosing a drone for light painting is important. Find ones with steady flight and programmable LED lights. The DJI Mavic series is a top pick for its stability and ease of use. Some drones are made just for aerial light art, with built-in light painting features.
Camera Settings for Aerial Light Painting
Getting the camera settings right is key for drone light trails. Use manual mode and adjust these settings:
- Shutter speed: 10-30 seconds
- Aperture: f/8 to f/11
- ISO: 100-400
Light Sources for Drone-Based Painting
LED lights are key for creating bright light trails. Here are your options:
| Light Source | Pros | Cons |
|---|---|---|
| Built-in drone LEDs | Easy to use, no extra weight | Limited color options |
| Attachable light bars | Customizable, bright output | May affect flight time |
| Specialized light painting drones | Designed for aerial light art | Higher cost |
With the right drone gear, LED lights, and long exposure settings, you’re set to make stunning aerial light paintings. These will take your photography to new heights.
Ground-Based Light Painting Techniques
Ground-based light painting techniques open up a world of creativity for photographers. You can make amazing visual effects using different methods and tools. Let’s look at some popular techniques to improve your light painting skills.

One fun technique is camera rotation. Move your camera in a full circle during a long exposure. This turns ordinary subjects into cool geometric patterns. It’s a great way to add something special to your light painting.
Creating light trails is also key in ground-based light painting. You need a steady tripod and a light source for this. Move the light in front of your camera during a long exposure to paint light trails across your picture.
Kinetic light painting is even more exciting. This method means moving both the camera and light sources at the same time. The result is dynamic, flowing pictures that go beyond regular photography.
| Technique | Equipment Needed | Effect |
|---|---|---|
| Camera Rotation | Camera, tripod, rotation tool | Geometric patterns |
| Light Trails | Camera, tripod, light source | Streaks of light |
| Kinetic Light Painting | Camera, light sources | Fluid, dynamic compositions |
Trying out different light sources can lead to amazing results. Use LED strips, flashlights, or custom tools to make unique shapes and patterns in your photos. Remember, the more you practice, the better you’ll get at these ground-based light painting techniques.
Planning Your Composite Shot
Creating a stunning composite shot that combines drone and ground-based light painting needs careful planning. This includes Location Scouting, Conceptual Photography, and Night Sky Photography. Let’s look at the key elements to think about when planning your masterpiece.
Selecting the Perfect Location
Location Scouting is key for a great light painting composite. Find places with interesting features and little light pollution. Bridges, piers, or sharp buildings are great subjects. They add contrast and depth to your photos, especially against a dark background.
Storyboarding Your Light Painting Concept
Conceptual Photography is crucial for light painting. Draw out your ideas and plan the drone and ground light movements. This helps you see the final image and makes sure everything works well together.
Timing and Weather Considerations
For the best Night Sky Photography, timing is key. Clear, moonless nights work best for light painting. Check the weather and moon phases to plan your shoot. Also, remember that cold weather can shorten your drone’s battery life, so bring extra batteries.
| Weather Condition | Impact on Light Painting |
|---|---|
| Clear Sky | Ideal for star trails and crisp light trails |
| Partly Cloudy | Can add interesting textures to the sky |
| Windy | May affect drone stability and long exposures |
| Rainy | Creates reflections but requires equipment protection |
By thinking about these factors, you’ll be ready to make amazing composite shots. These shots will blend drone and ground-based light painting perfectly.
Drone Flight Patterns for Light Painting
Learning how to fly your drone is key to making amazing aerial light trails. The way your drone moves affects the final picture. It’s important to know various patterns for light painting with drones.
Start with circular motions. Move your drone in a smooth circle to get perfect light rings. Change the size and speed to add depth and interest.
For complex shapes, try spirals. Start with a small circle and make it bigger as you go up or down.
Zigzags and straight lines add a geometric touch. Make your drone move in sharp angles or straight lines across the picture. Mix these with curves for dynamic light trails that grab attention.
Think about the depth of your scene when planning your drone moves. Go up or down while making shapes to add depth to your light painting. This makes your images stand out.
| Flight Pattern | Description | Effect |
|---|---|---|
| Circular | Smooth, continuous circles | Perfect light rings |
| Spiral | Gradually expanding circles | 3D corkscrew effect |
| Zigzag | Sharp angle changes | Geometric contrast |
| Straight lines | Long, direct paths | Clean, minimalist trails |
Try using programmable flight paths for more control over your light trails. Many drones today let you do this, making complex patterns easy to repeat. Practice different patterns to find what works best for you in drone light painting.
Ground-Based Light Painting Movements
Ground-based light painting opens up a world of creative possibilities. By mastering different movements and techniques, you can craft stunning visual effects. These effects bring your photography to life. Let’s explore how to create captivating shapes, use various light sources, and incorporate props for eye-catching results.
Creating Shapes and Patterns
Light Painting Tools allow you to draw shapes and patterns in the air. Start with basic geometric forms like circles, squares, and triangles. Practice smooth, fluid motions to achieve clean lines. As you gain confidence, try more complex designs like spirals, figure-eights, or even words.
Using Different Light Sources
Experiment with various Illumination Techniques to add depth and texture to your light paintings. LED strips offer consistent, colorful lines. Flashlights create focused beams for precise details. For a unique effect, try spinning burning steel wool (with proper safety precautions) to produce a shower of sparks.
| Light Source | Effect | Best Use |
|---|---|---|
| LED strips | Smooth, colorful lines | Large shapes, backgrounds |
| Flashlights | Focused beams | Details, writing |
| Burning steel wool | Sparks, fire-like effect | Dynamic, explosive scenes |
Incorporating Props and Objects
Creative Light Sources can transform everyday items into magical elements in your compositions. Use glow sticks to outline objects, or place LED lights inside translucent props for a soft, ethereal glow. Experiment with reflective surfaces to bounce and diffuse light in unexpected ways, adding depth and intrigue to your light paintings.
Camera Settings for Ground and Aerial Light Painting
Mastering camera settings is key for light painting, whether on the ground or in the air. Long exposure techniques are essential. They help capture stunning light trails and create mesmerizing night photos.

Begin by setting your camera to manual mode. This lets you control the exposure. For light painting, use long shutter speeds. These can be seconds to minutes, depending on what you want to achieve. Try different times to see how they change your light trails.
Keep your ISO low, between 100 and 400. This reduces noise in your photos, which is crucial at night. A narrow aperture, like f/8 to f/16, makes more of your scene sharp. It keeps everything from close-up to distant lights in focus.
| Setting | Recommended Range | Purpose |
|---|---|---|
| Shutter Speed | 2 seconds – 5 minutes | Capture light trails |
| ISO | 100 – 400 | Reduce image noise |
| Aperture | f/8 – f/16 | Increase depth of field |
These settings are just a starting point. As you get more experience, you’ll learn to adjust them for your scene and vision. Don’t hesitate to experiment and try new things to get unique results in your light painting.
How to Combine Drone and Ground-Based Light Painting for Mind-Blowing Results
Mixing drone and ground light painting makes amazing photos. It combines views from above and below for unique shots. With practice in multi-exposure techniques, you can make images that go beyond regular photos.
Coordinating Drone and Ground Movements
It’s important to match your drone’s flight with your ground light painting. Plan your moves so everything looks good together. Use a timer or remote to start and stop the light painting at the right time.
Balancing Exposure for Both Elements
Getting the right exposure for the drone and ground can be hard. Start with manual mode on your camera. Adjust ISO, aperture, and shutter speed to get the light right. Try different settings to find what works best.
| Element | ISO | Aperture | Shutter Speed |
|---|---|---|---|
| Drone Light | 400 | f/8 | 15 seconds |
| Ground Light | 200 | f/11 | 30 seconds |
Creating Depth and Dimension
To add depth, use the three-dimensional space. Add things like trees or rocks in the front. Use the drone for light patterns at different heights. This adds scale and perspective to your photo.
With practice, you can make stunning photos that mix ground and aerial light painting. Try different multi-exposure techniques to improve your skills. This will help you develop your unique style in this exciting art form.
Post-Processing Techniques for Light Painting Composites
After taking your drone and ground shots, it’s time to merge them. Adobe Photoshop is essential for this. You’ll blend your images together using layers and masks.
Begin by lining up your shots. The warp tool is great for fixing any misalignments. Then, blend your images together. Adjust the exposure to get a balanced look. Enhance the colors, saturation, and contrast to highlight your light painting.
Focus on the details in your composite. Ensure the horizon is straight and transitions between light painting elements are smooth. These small adjustments can greatly improve your final image. With practice, you’ll master creating stunning light painting composites that combine aerial and ground views perfectly.


